 5.0 Out Of 250+ Reviews


 Financing Available


 (214) 227-2763

Last Updated: November 5, 2026
Quick Summary
To get accurate independent repair estimates, document the damage yourself before anyone touches it, then hire a licensed local contractor to inspect and write an itemized scope. Compare that scope against the adjuster’s report line by line, and submit photos, measurements, and code citations for anything missing before you sign.
- A complete estimate ties measurements, quantities, unit prices, labor, materials, and code items to photos.
- Build a side-by-side spreadsheet of both estimates and sort rows by dollar difference, largest first.
- Ask for a re-inspection when the adjuster’s report misses visible damage or lacked a full roof or attic inspection.
- Confirm whether your policy pays replacement cost or actual cash value before challenging an adjuster’s number.
- Keep damaged materials bagged and labeled until the inspection is complete, and photograph them in place first.
Table of Contents
- What an Independent Repair Estimate Actually Is
- What to Include in a Property Damage Repair Estimate
- Insurance Adjuster vs Independent Contractor Estimate
- How to Choose a Contractor Who Produces Defensible Estimates
- How to Dispute an Insurance Claim Settlement
- Common Mistakes That Weaken Your Estimate
- Mistake 1: Skipping the declarations page
- Mistake 2: Confusing replacement cost with actual cash value
- Mistake 3: Ignoring percentage deductibles
- Mistake 4: Missing sublimits on valuables and temporary housing
- Mistake 5: Throwing away damaged materials before inspection
- Mistake 6: Accepting a verbal scope
- Mistake 7: Skipping the attic and interior checks
- Mistake 8: Letting one trade speak for all of them
- Mistake 9: Missing the claim deadline
- Mistake 10: Treating the first number as final
- A short policy-review checklist
- Request a StormPros Inspection Before You File
- Frequently Asked Questions
What an Independent Repair Estimate Actually Is
Independent repair estimates are written, itemized scopes of work and cost prepared by a licensed contractor who has no financial relationship with your insurance company.
That independence matters. The same problem recurs in storm claims: the first number a homeowner sees is rarely the full picture.
Here’s the short version of how to get accurate independent repair estimates:
- Document the damage yourself before anyone touches it.
- Hire a licensed, local contractor to inspect and write the scope.
- Compare that scope against the adjuster’s report, line by line.
- Submit supporting photos, measurements, and code citations for anything missing.
- Negotiate or request a re-inspection before you sign anything.
What to Include in a Property Damage Repair Estimate
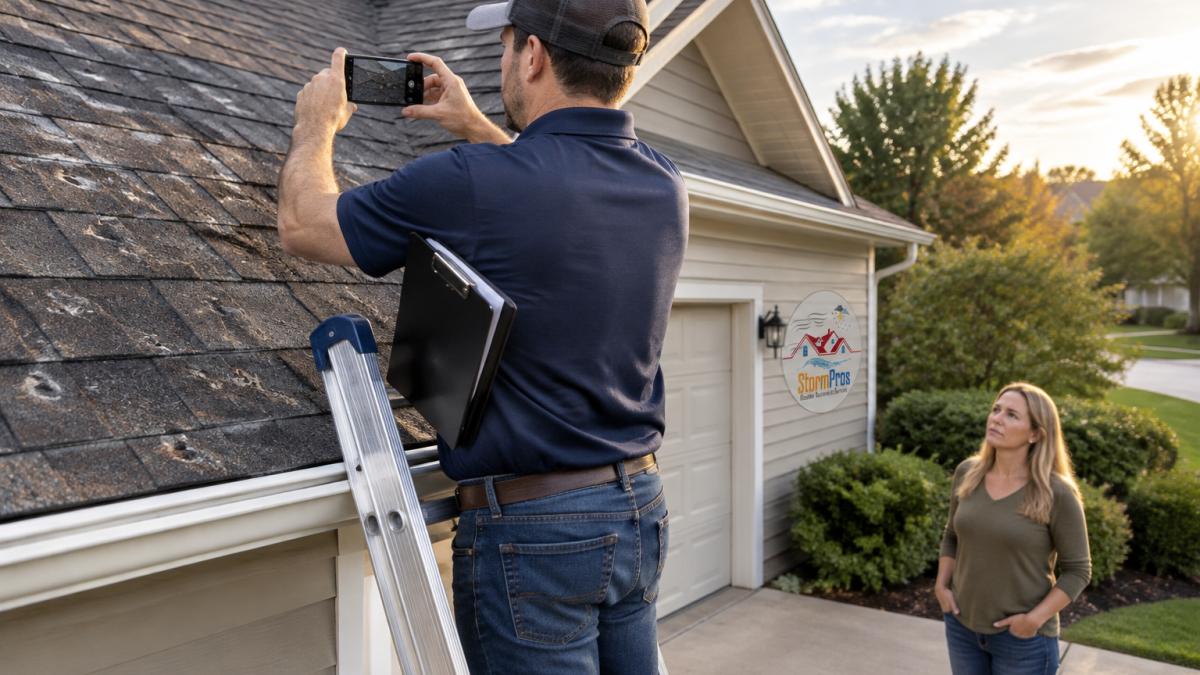
A complete estimate includes measurements, quantities, unit prices, labor, materials, and code-required items, all tied to photos. A number without a quantity behind it is a guess.
Line Items an Adjuster Will Check
Adjusters generally look for the same core items on roof and exterior claims. Missing one can lower the number.
- Square footage and pitch. Measured, not estimated from the ground.
- Tear-off and disposal. Old material removal and dumpster fees.
- Underlayment and ice/water barrier. Often skipped on quick estimates.
Documentation That Supports Every Number
Photos are the currency of a claim. A common mistake is photographing the damage but not the measurement.
- Wide shots showing the damaged area in context
- Close-ups with a tape measure or ruler in frame
- Photos of the same spot from two angles
If you’re unsure what belongs in a supplemental filing later, this guide on what to include in a supplemental insurance claim walks through the items adjusters expect to see.
Insurance Adjuster vs Independent Contractor Estimate
The adjuster’s estimate documents what the policy covers at the carrier’s allowed pricing; the contractor’s documents what the repair actually requires at local labor and material prices. They often disagree, and that is normal.
Knowing which kind of disagreement you’re looking at matters, because each is resolved differently. For practical guidance on how to handle insurance claim adjusters, including communication, documentation, and negotiation, keep that in mind as you work through the comparison.
Three kinds of gaps between the two estimates
Scope gaps. The adjuster’s report omits work your contractor included, decking, flashing, code-required ice barrier, gutter aprons.
Pricing gaps. Both reports include the same line item at different unit prices.
Coverage gaps. The work is real, but the policy excludes it, sublimits it, or values it at actual cash value rather than replacement cost.
How to build a line-by-line comparison
The most useful document you can create is a side-by-side comparison of the two estimates, organized by trade and by line item. A simple spreadsheet works:
- Column A: line item description from the contractor’s estimate.
- Column B: quantity and unit from the contractor’s estimate.
- Column C: unit price and extended price from the contractor’s estimate.
- Column D: the matching line from the adjuster’s report, or “not included.”
- Column E: the difference, in dollars.
- Column F: the evidence attached, photo number, measurement, code section, or supplier quote.
Sort the rows by dollar difference, largest first. The top ten rows usually account for most of the gap and are worth documenting in detail.
What the adjuster’s report is actually built from
Many carrier estimates are produced in standardized estimating software that prices line items from a regional database, a starting point, not a ceiling.
Adjusters also work from the inspection they were able to perform, and a brief inspection may not capture decking condition, flashing detail, or attic moisture.
When the gap is a code item
Code-required items, ice and water barrier, drip edge, ventilation upgrades, deck attachment, are frequently omitted from initial estimates because the adjuster’s software may not flag them. The strongest support is the specific code section your local building department enforces, cited by number, with a photo showing where it applies.
When to stop comparing and start asking
If the two estimates differ on scope and price but agree on what is damaged, you are in a normal negotiation. If they differ on whether the damage is covered at all, get a written coverage answer from the carrier before further comparison. Keep it with the claim file.
Signing a scope of work before comparing both numbers can lock you into a short settlement, and reopening a claim after cashing the check gets harder. Compare first, document the differences, then decide.
How to Choose a Contractor Who Produces Defensible Estimates
Pick a licensed, locally based contractor who inspects in person, documents with photos, and writes itemized scopes.
Storm chasers are the opposite profile. They knock after a storm, promise to “handle your insurance,” and may want a signed contract before any inspection.
Before you hire anyone, check these:
- License number is active and verifiable with the state
- Physical local address, not just a phone number
- Insurance certificate provided before work starts
To go deeper on spotting the difference, read hiring local contractors vs storm chasers. And since a licensed contractor’s paperwork carries far more weight with an insurer, this explanation of why you need a licensed contractor for storm repairs is worth five minutes.
How to Dispute an Insurance Claim Settlement
You dispute a settlement by submitting a written, itemized comparison backed by photos, measurements, and code references, then requesting review. Keep it factual; documentation moves a claim, emotion doesn’t.
The process looks like this:
- Request the adjuster’s full written report, not just the summary page.
- Mark every line where the scope or price differs from your contractor’s estimate.
- Attach photos and measurements that prove each missing item.
- Cite the specific code section for any code-related item.
- Submit in writing and ask for a response timeline.
When to Ask for a Re-Inspection
Ask for a re-inspection when the adjuster’s report misses visible damage or was written without a full roof or attic inspection. Say so plainly in writing and request that your contractor be present.
A second set of trained eyes on the roof changes outcomes more often than a long email does. For negotiation tactics that go beyond the first ask, this guide on how to negotiate a roof insurance claim settlement covers the follow-up steps.
Here is the dispute process laid out step by step.
| Step | What to do |
|---|---|
| 1 | Request the adjuster’s full written report, not just the summary page |
| 2 | Mark every line where scope or price differs from your contractor’s estimate |
| 3 | Attach photos and measurements that prove each missing item |
| 4 | Cite the specific code section for any code-related item |
| 5 | Submit in writing and ask for a response timeline |
Common Mistakes That Weaken Your Estimate
The fastest way to weaken a claim is to repair before you document, once the damaged material is in a dumpster, proving what was there becomes your word against a report. But the costliest mistakes usually happen before a single shingle comes off, while reading the policy and comparing it to the estimate.
Mistake 1: Skipping the declarations page
The declarations page, usually the first one or two pages of your policy, is the only place stating your dwelling limit, personal property limit, deductible, policy period, and any endorsements by name. If you have not read it, you do not know what your estimate is being measured against.
Watch out: A homeowner who assumes the dwelling limit equals the home’s market value will often underinsure the structure. Market value includes land, which is not insured; replacement cost is what it takes to rebuild, and those two numbers can diverge sharply.
Mistake 2: Confusing replacement cost with actual cash value
Replacement cost coverage pays to replace damaged property with new materials of similar kind and quality (Insurance for Your House and Personal Possessions). Actual cash value pays replacement cost minus depreciation (Are there different types of policies?).
Before you challenge an adjuster’s number, confirm which valuation method your policy uses for the specific property type. Roofs, in particular, are often scheduled at ACV on older policies and at replacement cost on newer ones.
Mistake 3: Ignoring percentage deductibles
A flat-dollar deductible is simple: $2,500 comes off the top of every covered claim. A percentage deductible is calculated against the dwelling limit, 2% on a $400,000 limit is $8,000, not $2,500.
If your estimate and the adjuster’s report differ by an amount close to your deductible, check the deductible type before assuming the scope is wrong.
Mistake 4: Missing sublimits on valuables and temporary housing
Policies commonly cap categories like jewelry, firearms, cash, and business property at sublimits far below the overall personal property limit. Additional living expenses, sometimes called loss of use, may also be capped by a dollar amount or a time period. An estimate that includes replacing items above a sublimit will be trimmed, and that trim is not an error.
Mistake 5: Throwing away damaged materials before inspection
Once the damaged material is gone, the adjuster has nothing to measure. Keep damaged items bagged and labeled until the inspection is complete, and photograph them in place first.
Mistake 6: Accepting a verbal scope
A verbal scope with no written, itemized estimate is not a scope. Ask for line items, quantities, and unit prices in writing, and keep every version you receive.
Mistake 7: Skipping the attic and interior checks
Water intrusion rarely stops at the roof surface. If the estimate covers shingles but not decking, insulation, or interior drywall, the scope is incomplete, and the adjuster may not find those items without a documented interior inspection.
Mistake 8: Letting one trade speak for all of them
Roof, siding, gutters, and painting are separate scopes with separate pricing. A single lump-sum estimate that covers all four trades is difficult to compare line by line and easy to underpay.
Mistake 9: Missing the claim deadline
Policy conditions set deadlines for notice of loss, proof of loss, and suit. These dates are in the policy, not in the adjuster’s letter. Put them on a calendar the day you open the claim.
Mistake 10: Treating the first number as final
A low estimate is a starting document, not a verdict. It can be challenged with documentation, but only if you preserved the evidence and read the policy first.
A short policy-review checklist
Use this after purchase, at renewal, and before you file:
- Named insureds and property address match your records
- Dwelling limit compared against a current rebuild cost estimate
- Personal property limit compared against a room-by-room inventory
If a line on the declarations page doesn’t match what you believe you bought, request written clarification from the insurer or agent and keep the response. State insurance departments publish consumer guides and complaint resources that can help you frame the question.
Request a StormPros Inspection Before You File
Filing before you have a documented scope is the single biggest reason claims come up short. Get the inspection first, then file with evidence in hand.
StormPros is a family-owned general contractor with more than 20 years of combined experience in storm damage restoration and property maintenance.
Contact StormPros for a FREE Quote to get started.
Frequently Asked Questions
Why should I get an independent repair estimate instead of relying on the insurance adjuster?
An adjuster works for the insurer and typically inspects the visible damage in a single visit. An independent contractor estimate is generally built from an inspection of the property and prices the work at local labor and material rates. Two documents give you something to compare. When the numbers differ, the line-item detail in your independent repair estimates shows exactly where the scope is short, which is far more useful than arguing over a lump sum.
Can I use an independent estimate to dispute an insurance claim settlement?
Yes. Most policies include an appraisal clause that lets either side request an independent evaluation when you and the insurer cannot agree on the amount of a covered loss. Before invoking it, send the adjuster a written comparison of the two scopes, item by item, and ask for a re-inspection. Keep every email and photo. If the gap persists, ask your contractor to walk the adjuster through the missed items on site, then escalate to appraisal or your state insurance department.
What information must be included in a professional repair estimate?
A usable estimate names the property and insured, states the date of loss and cause, and lists every repair by trade with quantities, unit prices, and labor. It should separate materials from labor, note code-required upgrades, and flag items that cannot be priced until tear-off reveals the extent of damage. Attach photos of each damaged area and a summary total. Estimates missing quantities or photos are easy for an adjuster to discount.
What should I do if my independent estimate is significantly higher than the insurance payout?
Start with a written line-by-line comparison, not a phone argument. Identify the specific items the insurer omitted or priced low, such as drip edge, ice and water shield, or decking replacement. Request a re-inspection with your contractor present so the adjuster can see the conditions firsthand. If the insurer still will not move, ask about the appraisal process in your policy and contact your state’s insurance department for guidance on next steps.


