 5.0 Out Of 250+ Reviews


 Financing Available


 (214) 227-2763

Last Updated: November 13, 2026
Quick Summary
To calculate storm damage repair costs, start with a documented room-by-room damage assessment, then build a line-item estimate that records quantity, unit, material cost, labor cost, and total for every repair. Price materials from two local supplier quotes, add labor as its own line, and compare your subtotal against at least two contractor bids.
- Photograph every affected surface and label each photo with the room and date before anything is moved.
- Roofing is sold by the square, siding and drywall by the square foot, and gutters by the linear foot.
- Apply a waste factor of 10 percent for simple gable roofs and 15 percent for hips and valleys.
- Keep emergency mitigation like tarps and board-up on separate lines from permanent repairs.
- Subtract your deductible from the approved claim total to see your real out-of-pocket figure.
Table of Contents
- Start With a Room-by-Room Damage Assessment
- Build Your Storm Damage Repair Estimate Line by Line
- How to Use a Storm Damage Repair Cost Calculator
- What Drives Roof Storm Damage Repair Cost
- Separate Emergency Mitigation From Permanent Repairs
- Budget for Hidden Damage and a Contingency Allowance
- How Your Storm Damage Insurance Claim Deductible Changes the Math
- Get a Verified Repair Estimate From StormPros
- Frequently Asked Questions
Start With a Room-by-Room Damage Assessment
A storm damage repair estimate starts with a documented, room-by-room damage assessment, not a guess from the driveway. Walk the property with a notebook and photograph every affected surface before anything is moved or thrown away.
StormPros helps homeowners turn that walkthrough into a claim-ready file. Here is the order we recommend:
- Exterior first: roof shingles, flashing, gutters, siding, windows, and skirting.
- Interior next: ceilings, walls, floors, and cabinets, with moisture readings at each spot.
- Systems last: electrical outlets, HVAC, and plumbing near the damage.
Label each photo with the room and date. That record becomes the backbone of your storm damage repair estimate and the first thing an adjuster asks for.
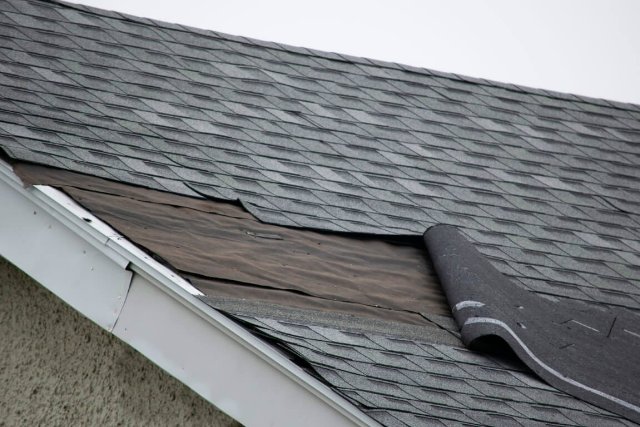
A proper storm damage assessment covers what insurance reviewers expect to see, so it is worth understanding before you start estimating.
Build Your Storm Damage Repair Estimate Line by Line
Line-item pricing is how professional storm damage repair estimates are commonly built, and it is how you should build yours. Every repair gets its own row: quantity, unit, material cost, labor cost, and total. The method below is a reusable worksheet you can apply to a roof, a wall, or a whole room.
Step 1: Measure the damaged area. Record length and width in feet for each surface, then convert to the unit the trade actually bills in. Roofing is sold by the square (100 square feet), siding and drywall by the square foot, gutters by the linear foot, and decking by the sheet. Round up to the next full unit, because suppliers do not sell partial squares or half sheets.
Step 2: Quantify materials, including waste. Multiply the measured area by a waste factor. A common pattern is 10 percent for simple gable roofs and 15 percent for hips, valleys, and multiple penetrations, because cutoffs and ridge caps consume extra material. Add accessory line items the area math hides: drip edge, ridge vent, step flashing, ice-and-water shield, house wrap, and trim.
Step 3: Price materials from supplier quotes. Call or pull current quotes from two local suppliers rather than relying on a national average. Record the quote date on the worksheet, because shingle and lumber prices move and an adjuster will ask how old your pricing is.
Step 4: Add labor as its own line. Labor is usually priced per unit (per square for roofing, per square foot for drywall) or per hour with a crew size. Ask each trade for its unit rate and whether it includes tear-off, disposal, and cleanup. Do not bury labor inside a material price; an adjuster cannot verify a blended number.
Step 5: Total the lines and compare. Add material, labor, and any permit or disposal fees to get a subtotal, then compare your subtotal against at least two contractor bids. Large gaps usually point to a missed line item, not a pricing error.
| Line item | Unit | What to record |
|---|---|---|
| Shingle removal | Square | Tear-off charge per square, disposal included? |
| Roof decking | Sheet | Replace or patch, thickness, nail pattern |
| Underlayment | Square | Type, coverage, ice-and-water shield at eaves |
| Flashing and drip edge | Linear foot | Step, apron, and ridge flashing; drip edge color |
| Siding | Square foot | Material grade, trim pieces, house wrap |
| Gutters | Linear foot | Size, guards, downspouts, hangers |
| Interior drywall | Square foot | Remove, replace, finish, prime, paint |
| Insulation | Square foot | R-value, batt or blown, vapor barrier |
| Labor | Hour or unit | Trade rate, crew size, days on site |
| Permits and disposal | Each | Local fee, dumpster size, dump fees |
A common mistake is lumping “roof repair” into one number. Adjusters often reject lump sums because they cannot verify them. If you want an independent estimate that holds up against an adjuster’s scope, learn how to get accurate independent repair estimates before you sign anything.
Watch out: measuring from the ground with a tape and a phone app undercounts complex roof geometry. If the roof has multiple valleys, dormers, or skylights, have the area verified on the roof or from aerial measurements before you price it.
How to Use a Storm Damage Repair Cost Calculator
A storm damage repair cost calculator multiplies your measured quantities by local unit prices to produce a working total. It does not replace an inspection, but it gives you a defensible number to compare against bids. The value is in the inputs, so treat the calculator as the last step after your worksheet is complete.
Run a worked example.
Run three versions of every line. Enter a low, mid, and high unit price for each row. The spread shows your estimate confidence and flags which line items carry the most uncertainty.
Adjust for local conditions. Many calculators rely on general averages, which may not reflect local conditions. Labor rates, permit fees, and building codes change by market, so treat calculator output as a starting point and adjust it with local quotes. Two adjustments matter most: permit fees (often a fixed fee plus a per-square-foot charge) and code upgrades such as ice-and-water shield or upgraded flashing that a local inspector may require on a repair.
Reconcile against an insurance estimate. Put your calculator total and the adjuster’s line items side by side, row by row. Match quantities first, then unit prices. A missing line (drip edge, disposal, permit) is easier to argue than a price difference, and it is the most common reason a first insurance estimate looks low. If the adjuster used depreciated pricing, compare your replacement-cost total to the recoverable depreciation figure rather than the first check.
Watch out: a calculator that asks only for square footage and material type will ignore tear-off layers, roof pitch, and height. Two layers of shingles or a steep two-story roof can add substantial labor that a simple calculator may not account for.
What Drives Roof Storm Damage Repair Cost
Roof storm damage repair cost depends on five things: damage severity, roofing material, roof pitch and height, decking condition, and whether the repair is a patch or a full replacement.
Hail damage often means bruised or cracked shingles that need matching replacements. Wind damage lifts shingles and can expose the roof decking to moisture intrusion. Tree damage adds debris removal and sometimes structural framing repairs.
Material choice moves the number a lot. Material choice affects cost, and repair versus replacement can change the math once damage covers a large portion of the roof. Steep roofs and multi-story homes add labor time and safety equipment.
FEMA’s guide to roof damage after storms explains how adjusters separate cosmetic marks from functional damage, which is a distinction worth knowing before you argue about a line item.
Separate Emergency Mitigation From Permanent Repairs
Emergency mitigation is the temporary work that stops further damage: tarps, board-up, water extraction, and debris removal. Permanent repairs restore the property. Keep them on separate lines in your estimate.
Insurance often handles these differently. Mitigation is often urgent, while permanent repairs go through scope approval. Mixing them into one figure makes it hard for an adjuster to see what was urgent and what was planned.
Our advice: photograph the tarp and the temporary repairs, keep every receipt, and list mitigation first in your documentation. The full storm damage repair process walks through each stage from emergency board-up to final inspection.
Budget for Hidden Damage and a Contingency Allowance
Hidden damage is the part of the estimate many homeowners miss. Moisture intrusion behind siding, rot under shingles, and cracked framing often only appear once tear-off begins. Set aside a contingency allowance so a surprise does not stall the job.
Watch out: signing a final settlement before tear-off is complete can leave you paying for hidden damage out of pocket. Ask your contractor to document anything found mid-job with photos and a written change order.
If new damage turns up after the claim closes, a supplemental insurance claim is how you recover the additional cost. Keep your original estimate and all photos organized so the supplement is easy to file.
How Your Storm Damage Insurance Claim Deductible Changes the Math
Your storm damage insurance claim deductible is the amount you pay before coverage kicks in, and it directly changes what the repair actually costs you. Subtract the deductible from the approved claim total to see your real out-of-pocket figure.
Some policies apply a separate percentage deductible for wind or hail claims, calculated against the dwelling coverage limit. Read your declarations page before you estimate, because a percentage deductible can be far larger than a flat one.
Depreciation matters too. Actual cash value policies pay the depreciated amount first and release recoverable depreciation after repairs are complete. Understanding homeowners insurance depreciation helps you see why the first check often looks smaller than the estimate. A low adjuster estimate is not final; a documented line-item estimate is the tool that gets it corrected.
Get a Verified Repair Estimate From StormPros
Guessing at storm damage repair costs leaves money on the table. A verified, line-item estimate backed by photos and local pricing gives you a number your adjuster can actually work with.
StormPros is family-owned, fully insured, and has more than 20 years of combined experience with storm restoration and insurance claims. The company offers roofing, siding, gutters, and painting services. We help homeowners navigate the insurance claim process.
For current pricing, visit the StormPros website or request a FREE quote.
Frequently Asked Questions
How do contractors estimate storm damage repairs?
Contractors measure affected square footage, then price materials and labor line by line using current local rates. They separate tear-off, disposal, decking replacement, and finish work so each item is visible. A thorough storm damage repair estimate also flags hidden damage allowances and required permits, which is why two contractors can quote different totals for the same roof.
What should a storm damage repair estimate include?
A complete estimate lists the repair scope, measured quantities, material costs, labor costs, debris removal, permits, and any contingency for hidden damage. It should also state whether prices reflect replacement cost or actual cash value. Ask for line-item pricing rather than a single lump sum so you can compare bids and reconcile the numbers against your insurance adjuster’s report.
How can I tell whether storm damage is worth filing an insurance claim for?
Compare your storm damage insurance claim deductible against the documented repair total. If the repair estimate is only slightly above the deductible, paying out of pocket may protect you from a premium increase. Larger structural damage, water intrusion, or multiple affected systems usually justify a claim. Document everything with photos before any temporary repairs.
What counts as storm damage on a home?
Storm damage includes wind-lifted or missing shingles, hail dents on roofing material and gutters, broken windows, siding cracks, fallen tree impact, and water damage from a breached roof or flashing. Interior water stains and rot often appear weeks later. A professional property inspection separates new storm damage from normal wear so your claim and repair estimate stay accurate.


