 5.0 Out Of 250+ Reviews


 Financing Available


 (214) 227-2763

Table of Contents
- Safety First: When to Inspect Your Roof and When to Call a Professional
- Start with a Visual Inspection from the Ground
- How to Check Roof for Hail Damage
- Signs of Wind Damage and Loosened Shingle Seals
- Inspecting Flashing, Vents, Skylights, and Other Components
- Interior and Attic Inspection Checklist
- How to Document Roof Damage for Insurance
- When to Schedule a Professional Roof Inspection After Storm
- Frequently Asked Questions
Last Updated: October 12, 2026
Safety First: When to Inspect Your Roof and When to Call a Professional
Learning how to inspect roof for storm damage yourself is critical, but safety matters more than speed. At StormPros, we’ve helped homeowners assess storm damage safely. The key is knowing when to inspect from the ground and when to call a professional.
Never climb onto your roof if conditions aren’t safe. High winds, rain, ice, or steep pitches create serious fall hazards. If the storm just passed, wait at least 24 hours for weather to stabilize.
Use this decision tree:
- Safe to inspect yourself: Clear skies, dry conditions, single-story home, gentle roof pitch, stable ladder access
- Call a professional: Steep roof, multi-story home, ongoing rain or wind, ice present, you’re uncomfortable with heights, structural damage visible from ground
Always start with a ground-level inspection, which catches most damage without climbing.
Start with a Visual Inspection from the Ground
How to inspect roof for storm damage yourself begins right here, on the ground, looking up. This is where you’ll spot the most obvious problems without any risk.
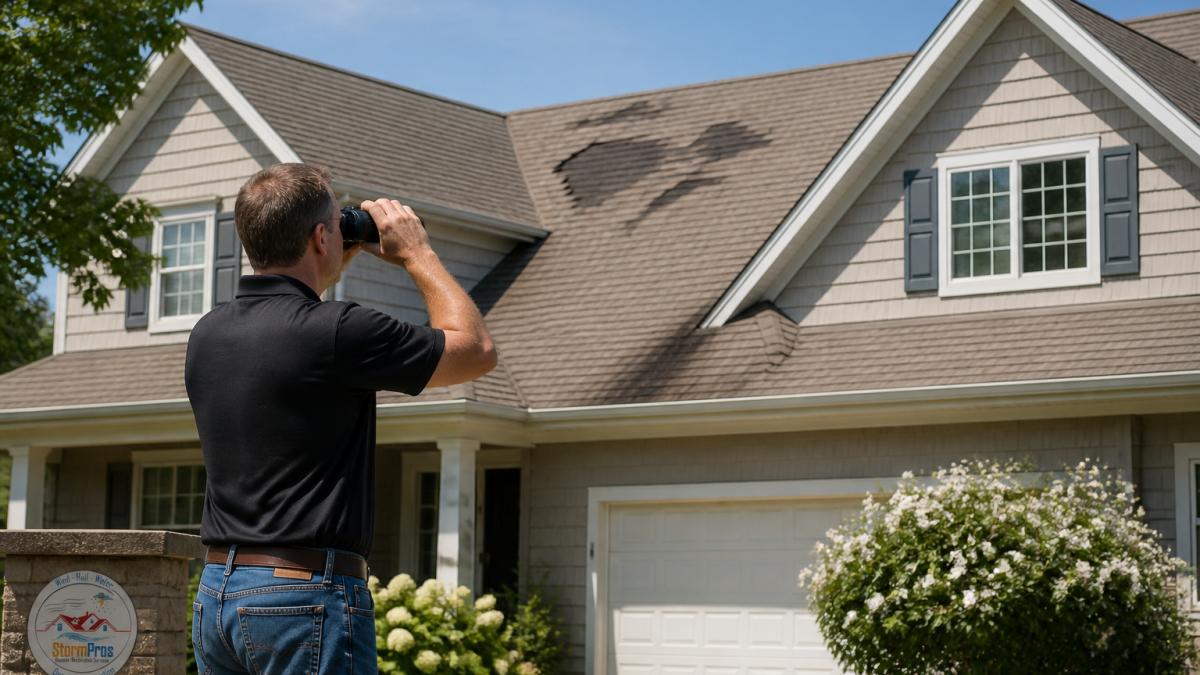
Stand 20-30 feet back, use binoculars if you have them, and examine the visible roofline systematically from left to right.
A healthy roof has a uniform profile. Sagging or uneven surfaces indicate structural issues underneath and require professional evaluation.
Check color uniformity. Storm damage creates patches where shingles are missing or show their darker underside, and scattered debris signals impact.
What to Look for on the Roofline
The roofline is where damage concentrates.
Lifted or curled shingles indicate wind damage: edges peel up and break the seal even when shingles stay attached.
Exposed nails are another red flag, allowing water to seep directly into the roof deck when shingles tear or lift.
Dark streaks or discoloration can indicate hail impact, algae, or water damage; storm-related marks appear as fresh bruising on the shingle surface.
Check edges and corners, where wind pressure is strongest and damage often appears first.
Checking Gutters and Downspouts for Debris and Granules
Gutters reveal a lot about roof condition. Storm damage sheds roofing granules, the small pebbles that protect shingles from UV damage (A Simple Guide to Understanding Your Asphalt Shingle Roofing System).
After a storm, check gutters for excessive granules (coarse sand-like pebbles); a small amount is normal, but a heavy buildup indicates shingle damage.
Clear debris like branches, leaves, and shingle pieces from gutters to prevent water backup.
Check downspouts too: blockages prevent drainage, and pooling water can seep under shingles and cause interior damage.
Sagging gutters pulling away from the fascia mean wind or impact loosened the fasteners, causing poor drainage and water intrusion.
How to Check Roof for Hail Damage
Hail damage is tricky because it doesn’t always look dramatic from the ground. Small dents compromise the shingle’s protective layer and accelerate deterioration.
Hail creates impact marks across a wide area, unlike wind damage, which concentrates at edges and corners.
Identifying Hail Impact Patterns on Shingles and Tiles
Hail creates distinctive dents or bruises on shingles. The impact marks are usually circular or slightly oval, depending on hail size and impact angle. On asphalt shingles, you may see:
- Soft spots where the granule coating is crushed
- Dents in the shingle body
- Missing granules exposing the asphalt underneath
- Cracked shingles with impact points
On tile roofs, hail creates visible cracks radiating from the impact point. Tiles may chip or crack completely through. These are easier to spot than asphalt shingle damage.
Look for impact marks in clusters: hail rarely hits one shingle, affecting multiple shingles across a section in a scattered pattern.
Check metal flashing and gutters: dents there mean your shingles are likely dented too.
Distinguishing Hail Damage from Wind and Age-Related Wear
Wind damage concentrates at edges, corners, and ridgelines; hail spreads across the entire roof surface.
Age-related wear shows gradual granule loss and fading, while storm damage creates sudden, localized changes.
Hail damage is fresh. The exposed asphalt or missing granules look new. Age-related damage has weathered edges and gradual transitions.
Wind-lifted shingles have clean edges; hail-damaged shingles have crushed or cracked edges at the impact point. This distinction matters for insurance claims.
If uncertain, take photos and let a professional assess them; adjusters are trained to distinguish these damage types.
Signs of Wind Damage and Loosened Shingle Seals
Wind damage manifests in several ways. The most common is lifted or separated shingles.
Loosened shingle seals are dangerous because they expose the roof to water intrusion immediately.
Look for shingles that aren’t lying flat. They may be curled at the edges or completely lifted.
Torn or missing shingles indicate severe wind damage.
Check for exposed nail heads. When shingles lift or tear, the nails holding them become visible.
Debris impact damage often accompanies wind damage. Branches, debris, and projectiles hit the roof during storms, creating punctures or tears alongside wind-related lifting.
Inspecting Flashing, Vents, Skylights, and Other Components
Flashing is metal edging that directs water away from vulnerable areas where the roof meets walls, chimneys, or other structures (Flashing and vents – Roof Builders Handbook).
Check where the roof meets the chimney. Flashing here should be tight and sealed.
Look at roof vents (the pipes and boxes protruding from the roof). Vents should sit flat and be sealed around the base.
Skylights need the same attention. Check the flashing around skylights. Lifted or damaged flashing here causes interior leaks directly into living spaces.
Examine any roof penetrations, where pipes, wires, or other items pass through the roof. These are common leak sources after storms.
Metal components like gutters, downspouts, and ridge caps should have no visible dents, bends, or separations. Dents indicate impact damage.
Interior and Attic Inspection Checklist
Water intrusion from roof damage doesn’t always show up immediately on the interior. Checking inside your home is essential to catch hidden damage early.
Room-by-Room Signs of Roof Leaks and Water Intrusion
Start in the attic. This is where roof leaks first appear.
Check for active dripping or moisture. If it’s still raining or recently rained, you may see water actively entering.
Examine insulation. Wet insulation loses its effectiveness and can develop mold. Look for dark, damp areas in the insulation.
Move through the home room by room. Check ceilings for water stains.
Look at walls, especially interior walls near the roof line.
Check closets and storage areas near exterior walls and under the roof.
Examine attic corners and valleys where the roof pitch changes. Water naturally flows to these low points and accumulates.
Attic Inspection for Hidden Moisture and Structural Damage
Moisture in the attic leads to mold, rot, and structural failure. Inspect the attic thoroughly for signs of moisture problems.
Look at wood framing. The roof deck, rafters, and trusses should be dry and solid.
Check for mold. Mold appears as dark spots or fuzzy growth on wood and insulation.
Look for sagging or uneven roof structure from inside the attic.
Examine the underside of the roof for sunlight. If you can see daylight through the roof deck, there are holes or significant damage.
Check ventilation. Proper attic ventilation helps dry moisture quickly. Poor ventilation allows moisture to accumulate.
How to Document Roof Damage for Insurance
Documentation is critical for insurance claims. Your photos and records help the adjuster understand the damage and justify your claim. Thorough documentation often results in higher claim payouts.
Photo and Documentation Protocol
Take photos systematically. Start with wide shots showing the overall damage pattern. Then take close-ups of specific damage areas.
Photo best practices:
- Use good lighting (daylight, not flash)
- Include reference objects for scale (a coin, a ruler, your hand)
- Capture multiple angles of each damaged area
- Document the entire roof, not just the worst spots
- Include photos of gutters, downspouts, and other components
- Take interior photos of water stains and damage
Label your photos with location and date. Create a simple spreadsheet noting which photo shows what damage and where on the roof it’s located.
Take video if possible. A short video walkthrough of the roof (from ground level) and interior damage helps the adjuster understand the full scope.
Creating a Damage Timeline and Record
Document when the storm occurred and when you discovered the damage. Insurance adjusters need this timeline.
Create a written record noting:
- Date of storm
- Date you discovered damage
- Weather conditions during the storm
- Type of damage observed
- Areas affected
- Any temporary repairs made
This timeline supports your claim and helps establish that damage is storm-related, not pre-existing.
Keep all photos, videos, and written documentation organized in one place. Digital folders work well. Back up your files to cloud storage in case originals are lost.
When to Schedule a Professional Roof Inspection After Storm
After documenting damage yourself, a professional inspection is the next step. Professional roofers have training and equipment to spot damage you might miss.
What a Professional Inspector Checks That You Might Miss
Professionals use ladders and can safely examine the roof up close.
They assess structural integrity.
Professionals understand local building codes and insurance requirements. They know what damage qualifies for insurance coverage and how to document it properly for claims.
They identify secondary damage. Water may have entered attic spaces or wall cavities. Professionals inspect these hidden areas for moisture and mold.
They provide repair estimates. Insurance adjusters use professional estimates to determine claim payouts. Detailed, professional estimates typically result in higher settlements.
Timing Your Professional Inspection and Insurance Claim
Contact your insurance company within a few days of discovering damage. Most policies require prompt notification. Delays can complicate claims.
Schedule the professional inspection quickly. Insurance adjusters often want to see a professional assessment.
Don’t delay on temporary repairs. If your roof is actively leaking, make temporary repairs to prevent further damage. Document these repairs with photos.
Coordinate with StormPros for a comprehensive assessment. Our team specializes in storm damage evaluation and insurance claim coordination.
Storm damage assessment requires patience and systematic inspection. Starting from the ground keeps you safe while catching most visible damage.
Frequently Asked Questions
Can I inspect my roof myself after a storm, or do I need a professional?
You can perform a ground-level inspection yourself to identify obvious damage like missing shingles, debris, or visible leaks. However, a professional roof inspection after a storm is recommended if you notice significant damage, suspect hidden water intrusion, or need documentation for an insurance claim. Professionals have specialized equipment and experience to spot damage you might miss, including damage to flashing, vents, and roof decking. If you’re uncomfortable climbing or the damage appears severe, contact a professional immediately.
What does hail damage look like on shingles?
Hail damage typically appears as small, round dents or bruises on asphalt shingles, often with exposed underlayment or a cracked area in the center. The damage pattern is usually random rather than linear, affecting multiple areas of the roof. Hail can also crack or chip roof tiles and damage flashing. Unlike wind damage, hail strikes don’t necessarily lift or tear shingles, they compress and crack them. Look for discoloration around impact points and missing granules in clusters rather than streaks.
How do I document roof damage for an insurance claim?
Take clear photos and video of all visible damage from multiple angles, including close-ups and wide shots showing the damage’s location on the roof. Document interior damage like water stains and ceiling damage in every affected room. Create a written record with dates, weather conditions at the time of the storm, and a list of damaged areas. Include photos of gutters filled with granules or debris. Store all documentation in a safe place and provide copies to your insurance adjuster. This documentation supports your claim and helps justify repair costs.
What should I do if I find roof damage after a storm?
First, document the damage with photos and notes before making any repairs. Contact your insurance company as soon as possible to report the damage and request an adjuster inspection. Take temporary measures to prevent additional water intrusion, such as tarping affected areas if safe to do so. Do not make permanent repairs until your insurance claim is processed, as this may affect your claim. Schedule a professional roof inspection to identify all damage, including areas you can’t see from the ground. Work with a qualified contractor to file a comprehensive claim and coordinate repairs.


