 5.0 Out Of 250+ Reviews


 Financing Available


 (214) 227-2763

Quick Summary
Roof leak detection starts in the attic, where you look for dark stains, wet insulation and daylight around the boards, then trace them upward toward the roof. A controlled hose test, soaking one section at a time for 10 to 15 minutes, confirms the entry point. Water often travels well away from where it enters, so trace wet wood back to its highest point.
- Start the attic inspection on a dry, sunny day to spot daylight through the roof boards.
- Follow wet wood upward from the stain, since the entry point is often higher than the damp area.
- Soak one roof section at a time with a hose for about 10 to 15 minutes.
- Use a moisture meter and photos to record readings and marks for your records.
- Call a professional if the leak is spreading, the source stays hidden, or the roof is unsafe.
Table of Contents
- Why Finding the Real Source of a Roof Leak Matters
- Gathering Tools and Safety Gear Before You Start
- How to Find a Roof Leak in the Attic
- Running a Controlled Hose Test to Pinpoint Entry Points
- Why Water Can Travel Far From Where It Enters
- Temporary Roof Leak Repair to Limit Damage
- Documenting Your Findings for Your Insurance Claim
- When to Stop DIY Checks and Book a Roof Inspection With StormPros
- Frequently Asked Questions
Why Finding the Real Source of a Roof Leak Matters
Last Updated: November 5, 2026
Water stains on a ceiling are usually the first sign of a roof leak, but the spot you see is rarely the place where water gets in.
Homeowners often patch the wrong spot. A few shingles get replaced over the stain, the ceiling dries out, and the leak comes back with the next heavy rain.
Here is what this guide covers:
- How to gather the right tools and safety gear
- How to trace a leak in the attic
- How to run a controlled hose test to confirm the entry point
A roof leak can also cause mold, rot, and structural damage that does not show up right away. Acting early limits the cost.
Gathering Tools and Safety Gear Before You Start
Good roof leak detection starts with the right supplies. You do not need expensive equipment, but you do need a few basics that keep you safe and help you see what is happening.
Tools to gather:
- A bright LED flashlight or headlamp
- A moisture meter for checking wet wood
- A ladder rated for your weight, with a stabilizer bar
Safety gear to wear:
- Non-slip shoes with good tread
- Work gloves
- A helmet if you will be on or near the roof
Never work on a wet or steep roof alone. A slip can cause serious injury. If the roof is steep, damaged, or has soft spots, stop and call a professional.
How to Find a Roof Leak in the Attic
The attic is usually the best place to start.
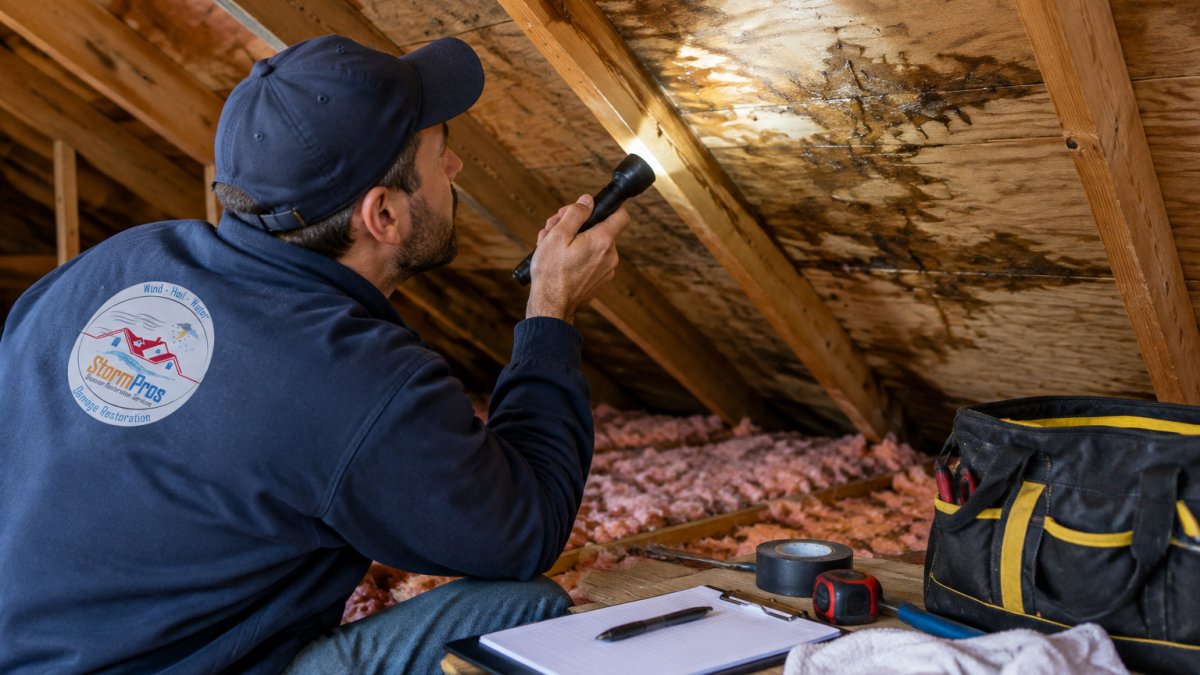
Begin by turning off any attic lights and using your flashlight. Look for:
- Dark stains or wet spots on the underside of the roof deck
- Stained or matted insulation
- Rusted nail tips poking through the boards
Start under the stain on your ceiling and work upward, following the rafters toward the roof.
Use a moisture meter on any wood that looks damp. Readings that stay high on dry days suggest a leak that has not stopped.
Watch out: Do not step on the ceiling drywall or on insulation.
Running a Controlled Hose Test to Pinpoint Entry Points
Once you have a likely area, a hose test helps confirm the source.
- Pick one section of the roof, starting at the lowest area and moving up.
- Have a helper in the attic with a flashlight and a phone to call out when water appears.
- Soak one area with a garden hose for about 10 to 15 minutes. Start low and work up.
- Stop and check the attic if no water shows up after that time, then move to the next section.
- Mark the exact spot on the roof when water appears in the attic.
Test one section at a time so you know which area caused the leak. Many people spray too much water at once and cannot tell where it came in.
Test during a dry spell so rain does not confuse the results. Do not test in cold weather, because water can freeze and create hazards on the roof.
Why Water Can Travel Far From Where It Enters
Water does not drip straight down. It follows the path of least resistance. It can run along a nail, slide down a rafter, or soak into insulation and then drip several feet away.
Common reasons the leak appears in the wrong place:
- Water runs along the roof deck before dripping through
- Insulation holds water and releases it slowly
- Wood beams carry water along their length
Keep this in mind when you check the attic. Follow the wet wood upward, not just below the stain. Look for the highest wet spot and trace it back to the roof.
Temporary Roof Leak Repair to Limit Damage
If you find the source but cannot repair it right away, a temporary fix can limit damage until a permanent repair is made.
Common temporary steps include:
- Placing a tarp over the damaged area, secured with sandbags or boards
- Sealing small cracks or nail holes with roofing sealant
- Placing a bucket or tub under drips inside the home
Do not walk on a wet or damaged roof to install a tarp. See how to prevent interior water damage from a roof leak while the repair is pending.
Keep your temporary repair photos and receipts. You will need them if you file an insurance claim.
Documenting Your Findings for Your Insurance Claim
If the leak came from a storm, your homeowner’s insurance may cover the repairs. Good documentation helps your claim move faster and reduces the chance of a denial.
Keep a simple record:
- Photos: Take wide shots of the damaged area and close-ups of each mark. Include a tape measure or a coin in at least one close-up so scale is clear.
- Dates: Write down when you first noticed the leak and when each test was done.
- Locations: Note the exact spots on the roof and in the attic, and sketch a simple roof diagram with the wet areas marked.
Keep copies of everything. Find out why storm damage claims are denied so your documentation avoids the most common pitfalls. Learn how to negotiate a roof insurance claim settlement if the offer falls short of your documented damage.
Understand what your policy actually pays
Before you talk to an adjuster, read the coverage section of your policy. Two terms drive most of the money:
- Actual Cash Value (ACV): pays the depreciated value of the damaged roof. A 15-year-old shingle roof does not pay out at new-roof prices.
- Replacement Cost Value (RCV): pays what it costs to replace the damaged property with new materials of similar kind and quality, without deducting for age.
Many policies pay ACV up front and hold back the difference, called recoverable depreciation, until you show the work was completed. That holdback is not a denial; it is a second check you have to claim. Keep your contractor’s final invoice and photos of the finished work so you can request it.
Prepare for the adjuster visit
The adjuster is not on your side or against you, they are working from a scope of loss. Your job is to make their inspection easy and to make sure their scope matches the damage you documented.
- Have your photo log, dates, and roof diagram ready before they arrive.
- Walk the property with them if they allow it, and point out each marked area.
- Ask for a copy of the scope of loss and the measurements they used.
- Compare their scope line by line against your photos. Missing line items, drip edge, ridge cap, underlayment, ice-and-water shield, are common.
Watch out: Do not sign a completion certificate or a final release until you have compared the adjuster’s scope to your own documentation and confirmed the holdback amount in writing.
Use the supplement process when the scope is short
A supplement is a request for additional money after the initial claim is approved, usually because hidden damage was found once the shingles came off. This is one of the most common pain points homeowners face and one of the least explained. If your contractor finds rotted decking, failed flashing, or code-required upgrades that were not in the original scope, they document it with photos and measurements and submit a supplement to the insurer.
If the claim is denied or underpaid
Review the denial letter carefully and ask the insurer to explain the reasons in writing. Common grounds are wear and tear, lack of maintenance, or a policy exclusion.
Keep every version of every document. If the claim ends up in appraisal or a dispute, the timeline of what you sent and when is often the deciding evidence.
The article’s key insurance terms are summarised below so you can check your policy quickly.
| Term | What it means | Key point |
|---|---|---|
| Actual Cash Value (ACV) | Depreciated value of the damaged roof | Older roofs pay out less |
| Replacement Cost Value (RCV) | Cost to replace with similar materials | No deduction for age |
| Recoverable depreciation | Held-back difference after ACV payment | Claimed once work is completed |
| Supplement | Extra request for hidden damage | Needs claim number and evidence |
| Appraisal clause | Formal dispute process with appraisers and umpire | Used when you disagree on the amount |
When to Stop DIY Checks and Book a Roof Inspection With StormPros
DIY checks can find many leaks, but they have limits. Call a professional if:
- The leak is large, spreading, or still getting worse
- You cannot find the source after the attic and hose tests
- The roof has soft spots, sagging, or missing shingles
- You see mold, rot, or damage to the framing
What a professional inspection actually gives you
A professional inspection can produce a written report with photos and measurements that documents the condition of the roof and attic.
Ask for the report in writing, with photos labeled by location. That document is what you attach to a claim or a supplement request. A verbal ‘you need a new roof’ is not evidence.
How it differs from your DIY findings
Your attic and hose tests tell you where water enters.
A professional inspection confirms the source and shows damage you may have missed. Get a professional damage inspection from StormPros to find the exact cause of the leak and the extent of the damage.
If you are unsure what the signs of rot or structural damage look like, read our guide on identifying roof rot after storms before you climb into the attic.
Once the source is confirmed and repaired, the next step is making sure your home is protected from further water damage.
Frequently Asked Questions
Can I check for a roof leak from inside the attic?
Yes. Go into the attic during or right after rain with a bright flashlight. Look at the underside of the roof deck, the rafters, and the insulation directly beneath suspected areas. Dark stains, damp wood, matted insulation, and water trails running along rafters all point toward an entry point. Mark the spots with painter’s tape or a pencil, then compare them with what you see on the roof surface. Wet insulation and staining that appears after rain are the clearest signs you have found the leak.
What tools do I need to detect a roof leak?
A bright LED flashlight, a moisture meter, a garden hose, a helper, a ladder, painter’s tape, a notebook or phone for photos, and a pair of work gloves cover most DIY roof leak detection. A moisture meter helps confirm whether wood is still damp after the rain has stopped. A hose is used for controlled testing on dry days. Always use a stable ladder on level ground and never work on a wet or steep roof alone.
How do I use a hose to find a roof leak?
Work from the bottom of the roof upward. Have a helper stand in the attic while you run the hose gently on one section at a time, starting low and moving up in short, steady bursts for about 10 minutes per section. Keep the water off the shingles above the test area so you do not confuse results. When water appears in the attic, your helper calls out and you stop. Mark the spot, then repeat the test on that area to confirm before concluding the source.
When should I stop inspecting a roof leak and call a professional?
Stop DIY checks and call a professional if you cannot find the entry point after a controlled test, if you see sagging decking, widespread rot, or mold, or if the leak follows a storm that may have caused hail or wind damage. Stop immediately and call for help if ceilings bulge, electrical fixtures are wet, or you feel unsafe on the roof. A professional roof inspection can document damage properly, which also matters if you plan to file an insurance claim with your carrier.


