 5.0 Out Of 250+ Reviews


 Financing Available


 (214) 227-2763

Last Updated: October 25, 2026
Quick Summary
The siding replacement process begins with inspecting your existing siding and underlying structure for damage, then measuring your home to estimate materials, removing old siding, repairing any damaged sheathing, installing housewrap and flashing, hanging new panels with proper overlap, and finishing with trim installation and caulking.
- Start by inspecting for rot, water damage, and structural issues using a screwdriver to test soft spots in wood.
- Add 10% to your material estimate for waste, cuts, and mistakes during installation.
- Install housewrap with 6-inch overlapping seams and staple every 12 inches to create a secondary water barrier.
- Leave 1/4-inch expansion gaps at corners and trim to allow siding to expand and contract.
- A typical single-story home siding replacement takes 2-4 weeks depending on weather and hidden damage discovered.
Table of Contents
- Assess Your Existing Siding and Underlying Structure
- Measure Your Home and Estimate Material Needs
- Siding Installation Steps for Proper Replacement
- How Long Does Siding Replacement Take
- How to Replace Damaged Siding Between Full Replacements
- Siding Replacement Cost and Budget Planning
- Permits, Code Compliance, and Lead-Safe Practices
- Final Inspection and Quality Assurance
- Frequently Asked Questions
Assess Your Existing Siding and Underlying Structure
The first step in any siding replacement process is understanding what you’re working with. This inspection determines whether you need a full replacement or targeted repairs, and it reveals hidden damage that could cost thousands if left untreated. Learn how to inspect siding after a storm with a step-by-step guide to spot damage before beginning replacement.
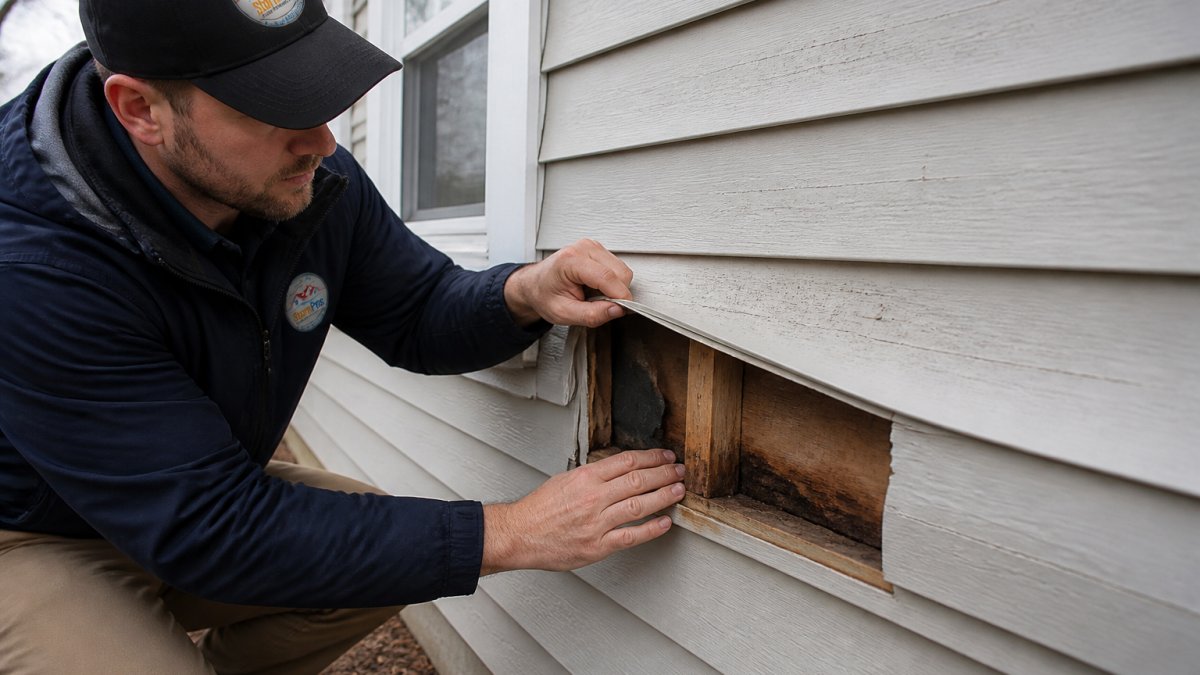
Initial Inspection Checklist
Walk around your home systematically. Look at every wall, paying attention to the siding installation patterns and where panels meet trim.
Examine your existing siding from multiple angles. Morning light often reveals damage that’s hidden at midday.
Document everything you find:
- Cracks or splits in panels
- Gaps between panels or at trim
- Soft or spongy sections
Take photos from multiple angles. These become your baseline for comparing before and after, and they help contractors understand the scope of work needed.
Identifying Rot, Water Damage, and Structural Issues
Rot is the enemy of siding replacement. It spreads silently behind your panels, weakening the framing and sheathing.
Press firmly on suspicious areas with a screwdriver or awl. If the tool sinks easily into wood, you’ve found rot. Soft spots mean water has compromised the material.
Look for these warning signs:
- Soft wood that yields to pressure
- Discoloration or dark staining on sheathing
- Visible mold or mildew
Water intrusion often travels along the framing behind siding. Trace any staining upward to find the entry point.
A thorough inspection of your existing siding and underlying structure is the foundation of a successful replacement. Siding and wood rot repairs address damage found during inspection through installation, replacement, and repair services. If you’re uncertain about what you’re seeing, professional damage inspection services can identify issues before they become costly repairs.
Measure Your Home and Estimate Material Needs
Accurate measurements prevent costly mistakes and material waste. Measure every wall section, accounting for doors, windows, and architectural features.
Start at one corner and work systematically around your home. Measure the height from the foundation to the roofline.
Calculate the total square footage of siding needed. Most contractors measure in “squares”, 100 square feet per square.
Record these measurements:
- Height of each wall section (in feet)
- Width of each wall section (in feet)
- Number and size of windows and doors
Add 10% to your material estimate for waste, cuts, and mistakes.
Siding Installation Steps for Proper Replacement
The actual installation follows a logical sequence. Rushing any step creates problems that appear months later. Proper siding replacement process work requires attention to detail at every stage.
Removing Old Siding and Preparing the Surface
Start by protecting your landscaping and any items near the work area. Old siding removal creates dust and debris.
Remove siding panels from top to bottom. Use a zip tool to separate overlapping panels, then pry carefully to avoid damaging the sheathing underneath.
As you remove old siding, inspect the sheathing. Look for soft spots, rot, or water damage. Mark any areas that need repair.
Follow these steps:
- Remove trim and flashing around windows and doors
- Disconnect gutters if they interfere with siding removal
- Use a zip tool to separate overlapping panels
- Pry panels away carefully, starting at the top
- Remove all nails and fasteners
- Clean debris from the sheathing surface
- Inspect the entire sheathing for damage
Repairing Sheathing and Framing
Any soft or rotted sheathing must be replaced. Cut away damaged sections carefully, using a saw to create clean edges. Replace with new plywood sheathing of the same thickness.
Secure new sheathing with galvanized nails or screws, spacing fasteners 8 inches apart around edges and 12 inches in the field. Use fasteners that won’t rust, corrosion weakens the connection and stains new siding.
If framing is damaged, this work becomes more complex. Framing repairs often require temporary bracing and professional assessment. This is where hidden costs emerge during siding replacement process work.
Address any structural damage:
- Replace rotted sheathing completely
- Reinforce weakened framing
- Correct any settling or movement
Installing Housewrap and Weather-Resistant Barrier
Housewrap creates a secondary water barrier. It allows moisture vapor to escape while blocking liquid water. Proper installation of this weather-resistant barrier prevents water intrusion behind your new siding.
Unroll housewrap from top to bottom, overlapping seams by 6 inches. Staple to the sheathing every 12 inches. Wrap around window and door openings, cutting an X in the center and folding edges into the opening. Tape all seams with housewrap tape.
Install flashing around windows and doors before hanging siding. Flashing directs water down and away from openings. Improper flashing is the leading cause of water damage in new siding installations.
Key installation steps:
- Unroll housewrap from top to bottom
- Overlap seams by 6 inches minimum
- Staple every 12 inches
- Wrap and tape all openings
- Install window and door flashing
- Ensure flashing slopes downward
- Tape all seams with appropriate tape
Hanging New Siding Panels and Trim
Start at the bottom with a starter strip.
Hang the first course of siding panels.
Each successive course overlaps the previous one. This overlap sheds water downward.
Follow the siding installation steps carefully:
- Install starter strip at the bottom
- Ensure starter strip is level
- Hang first course of panels
- Maintain proper overlap between courses
- Leave expansion gaps at corners and trim
- Fasten according to manufacturer specs
- Check alignment frequently
- Adjust as needed to maintain plumb
Install trim around windows, doors, and corners. Trim seals gaps and provides a finished appearance.
Proper siding replacement follows a logical sequence of key stages, each critical to the success of the project.
| Stage | What to Do | Key Detail |
|---|---|---|
| Remove Old Siding | Use zip tool to separate panels, pry carefully from top to bottom | Avoid damaging underlying sheathing |
| Repair Sheathing | Replace rotted sections with new plywood, secure with fasteners | Space fasteners 8 inches apart at edges |
| Install Housewrap | Unroll top to bottom, overlap seams by 6 inches, staple every 12 inches | Wrap and tape all window and door openings |
| Install Flashing | Place around windows and doors before hanging siding | Ensure flashing slopes downward |
| Hang New Panels | Start with starter strip at bottom, maintain consistent overlap | Leave 1/4-inch expansion gaps at corners |
| Install Trim | Seal gaps around windows, doors, and corners with caulk | Use paintable, flexible caulk only |
How Long Does Siding Replacement Take
The timeline depends on your home’s size, weather, and the scope of hidden damage discovered during removal. A typical single-story home takes 2-4 weeks.
Weather significantly impacts scheduling. Rain halts work. High winds make installation dangerous. Cold temperatures affect material flexibility and caulk curing.
Hidden damage discovered during removal extends timelines. If sheathing or framing needs replacement, add 1-2 weeks.
Typical project timeline:
- Week 1: Inspection, measurement, material ordering
- Week 2: Old siding removal, sheathing inspection and repair
- Week 3: Housewrap installation, new siding hanging
How to Replace Damaged Siding Between Full Replacements
Not all siding damage requires full replacement. Localized damage can be repaired by replacing individual panels or sections. This approach costs less and preserves your existing siding installation.
Identify the damaged panel. Use a zip tool to separate it from adjacent panels. Remove fasteners carefully.
Match the new panel to existing siding. Color fade may make new panels stand out initially. They’ll blend as weathering occurs.
Steps for replacing individual panels:
- Locate the damaged panel
- Use a zip tool to separate from adjacent panels
- Remove all fasteners
- Slide out the damaged panel
- Slide new panel into place
- Check alignment and overlap
- Secure with appropriate fasteners
- Ensure proper expansion gaps
Siding Replacement Cost and Budget Planning
Siding replacement cost varies based on material choice, home size, and labor rates. Budget planning requires understanding what drives expenses and building in contingency for surprises.
Material and Labor Cost Factors
Material costs depend on siding type. Vinyl costs less than fiber cement or metal. Your choice affects the total budget significantly. Labor typically represents 40-60% of total cost.
Factors affecting cost:
- Siding material type and quality
- Home size and complexity
- Roof pitch and accessibility
Get multiple quotes to understand pricing in your area. Quotes should itemize material costs, labor, disposal, and contingency. Compare what’s included in each quote, some contractors include trim and flashing, others charge separately.
Contingency Planning and Hidden Damage
Budget 10-15% contingency for unexpected issues. Hidden damage discovered during removal is common. Water damage, rot, or structural issues emerge once old siding comes off. This contingency prevents budget overruns.
Common surprises during siding replacement:
- Rotted sheathing requiring replacement
- Damaged framing needing reinforcement
- Mold or moisture remediation
Discuss contingency with your contractor before work begins. Understand what’s covered in the initial quote and what triggers additional charges. Clear communication prevents disputes when surprises occur.
Permits, Code Compliance, and Lead-Safe Practices
Siding replacement often requires permits. Building codes ensure proper installation and protect your home’s structural integrity.
Building code requirements for exterior walls specify how siding must be installed. Codes address fastener spacing, overlap requirements, flashing details, and weather barriers.
Permits typically cost $100-500 depending on your jurisdiction. Permitted work protects your home’s value and ensures proper installation. Understand why you need a licensed contractor for storm repairs to handle permits, code compliance, and lead-safe practices.
Lead-safe practices apply to homes built before 1978. Lead paint on old siding poses health risks, especially for children. EPA lead-safe work practices require contractors to follow containment and cleanup procedures.
Key compliance requirements:
- Obtain required permits before starting work
- Follow local building codes for siding installation
- Use lead-safe practices for pre-1978 homes
Why you need professional help: licensed contractors for storm repairs understand permit requirements, building codes, and lead-safe practices. They handle the administrative burden and ensure compliance.
Final Inspection and Quality Assurance
After installation, inspect the entire job before final payment. Check that panels are aligned, overlap is consistent, and fasteners are secure.
Walk around your home with the contractor. Point out any concerns. Check inside for water intrusion or drafts.
Quality assurance checklist:
- All panels aligned and overlapping correctly
- No gaps between panels or at trim
- Fasteners secure and properly spaced
Document the final condition with photos. Keep all warranty documentation. Request a written warranty covering materials and labor. Understand what’s covered and for how long.
Frequently Asked Questions
How long does siding replacement take on an average home?
Most residential siding replacement projects take 3-7 days, depending on home size, weather conditions, and the extent of underlying damage. A single-story home with straightforward vinyl siding replacement typically finishes in 3-5 days. Larger homes, complex trim work, or discovered structural damage can extend the timeline. Weather delays and material availability may also affect scheduling.
What is the typical cost range for residential siding replacement?
Siding replacement cost varies based on home size, material choice, labor rates, and regional factors. Vinyl siding is generally the most affordable option, while fiber cement and wood siding cost more. Pricing depends on square footage, the condition of underlying sheathing, and whether structural repairs are needed. Contact StormPros for a free quote tailored to your specific project and home condition.
Do I need a permit for residential siding replacement?
Permit requirements vary by location and local building codes. Most jurisdictions require permits for full siding replacement to ensure work meets current code standards, especially regarding weather-resistant barriers and flashing installation. If your home was built before 1978, lead-safe practices may apply. StormPros handles permit coordination and ensures all work complies with local regulations.
What should I do if I discover rot or structural damage during siding removal?
Stop work immediately and document the damage with photos. Rot in sheathing or framing requires professional assessment and repair before new siding installation. Hidden water damage can compromise your home’s structure if left unaddressed. StormPros inspects thoroughly during the assessment phase and includes structural repairs in project planning, preventing costly surprises and protecting your home’s integrity.
Siding replacement protects your home’s foundation and structure. The process demands attention to detail at every stage, from initial inspection through final quality checks. When you’re ready to begin, StormPros specializes in comprehensive siding replacement with the expertise to handle hidden damage, code compliance, and insurance coordination. Get a free quote and let our team guide you through every step of the process.


