 5.0 Out Of 250+ Reviews

 Financing Available

 (214) 227-2763
Table of Contents
- What Drives the Average Cost of a Professional Roof Inspection
- What Is Included in a Roof Inspection
- How Long Does a Roof Inspection Take
- Your Roof Inspection Checklist: What a Thorough Report Covers
- Roof Inspection After a Storm: What Changes
- When a Free Inspection Is Enough and When to Pay for More
- Frequently Asked Questions
Last Updated: October 8, 2026
What Drives the Average Cost of a Professional Roof Inspection
The average cost of professional roof inspection depends on roof size, pitch, material, and how deep the inspection goes. A basic visual check on a modest single-story home sits at the low end, while a full inspection with attic access, moisture readings, and a written report pushes higher. The more the inspector has to climb, measure, and document, the more the job costs.
Most homeowners assume every inspection is priced the same. It is not.
Roof Size, Pitch, and Material
Square footage is the first number that moves the price. A larger roof takes longer to walk, photograph, and map. Steep pitch adds time and risk, so inspectors charge more for it. Material matters too. Asphalt shingles are quick to check. Tile, metal, and slate take longer because the inspector has to look for cracks, loose fasteners, and lifted panels without damaging the surface.
Inspection Type and Add-On Services
The type of inspection you book changes the price more than anything else.
- Basic visual check: ground and ladder-level look at the roof surface
- Full inspection: roof, attic, flashing, gutters, and ventilation
- Storm or insurance inspection: documented damage with photos and a written report
- Add-ons: drone imaging, moisture meters, thermal imaging, and core sampling
Each add-on adds time and equipment. That time is what you pay for.
Ask what the report includes before you book. A cheap inspection that gives you a verbal “looks fine” is worth less than a written report with photos you can hand to an insurance adjuster later.
What Is Included in a Roof Inspection
A standard roof inspection covers the roof surface, flashing, penetrations, gutters, and, when accessible, the attic. But the difference between a cheap glance and a report you can act on comes down to how the inspector diagnoses problems, not just what they look at. Use the checklist below to judge whether the inspection you are paying for will actually tell you what is wrong and what to do about it.
Exterior and Attic Checks
The exterior pass covers shingles, ridge caps, vents, and chimney flashing. The inspector notes granule loss, curling edges, and any soft spots underfoot. The attic pass looks for daylight coming through the roof deck, dark water stains on rafters, damp insulation, and rusted nails. Those interior clues often reveal damage the exterior hides.
Diagnostic Checklist: Finding the Cause, Not Just the Symptom
A thorough inspector does not stop at “there is a stain.” They trace it. Ask whether your inspector will work through this sequence:
- Attic heat-leak scan: Look for warm spots, frost patterns, or melted snow bands on the roof deck that point to escaping interior heat.
- Insulation depth and coverage: Check for compressed, missing, or uneven insulation, especially at the eaves and around penetrations.
- Air-sealing gaps: Inspect around recessed lights, attic hatches, plumbing stacks, and top plates where warm air escapes into the attic.
- Ventilation balance: Confirm intake (soffit) and exhaust (ridge, gable, or roof vents) are both open and sized to the attic volume.
- Moisture mapping: Use a moisture meter at stains, valleys, and flashing to distinguish active leaks from old ones.
- Flashing and penetration detail: Check step flashing at sidewalls, counter-flashing at chimneys, and boots at vents and pipes.
- Gutter and downspout flow: Confirm water moves away from the eave and does not back up under the roof edge.
If the inspector cannot explain why a problem is happening, not just that it exists, you are paying for a photo album, not a diagnosis.
Tailoring by Roof Type and Climate
What matters most shifts with the roof and the region:
- Cathedral or vaulted ceilings: No attic access means the inspector must rely on exterior clues, thermal imaging, and interior ceiling readings.
- Complex rooflines: Valleys, dormers, and multiple planes create more leak points and take longer to map.
- Older homes: Original flashing, layered shingles, and undersized ventilation are common and change the repair scope.
- Freeze-thaw regions: Ice dams, eave protection, and ice-and-water barrier condition move to the top of the list.
- Hot, humid regions: Attic ventilation and moisture control matter more than ice concerns.
What a Basic Inspection Leaves Out
A basic inspection usually skips the attic, moisture testing, and thermal imaging. It also skips the written report in many cases. That is fine if you just want a quick read on condition. It is not fine if you are filing a claim or buying a home. In those cases, you need documentation, not a glance.
Never let an inspector walk the roof in unsafe conditions, wet, icy, or steep pitches. A qualified inspector will use a ladder, binoculars, a drone, or attic access instead of risking a fall. Chopping ice or using an open flame to clear a roof is never worth the risk of injury, fire, or shingle damage.
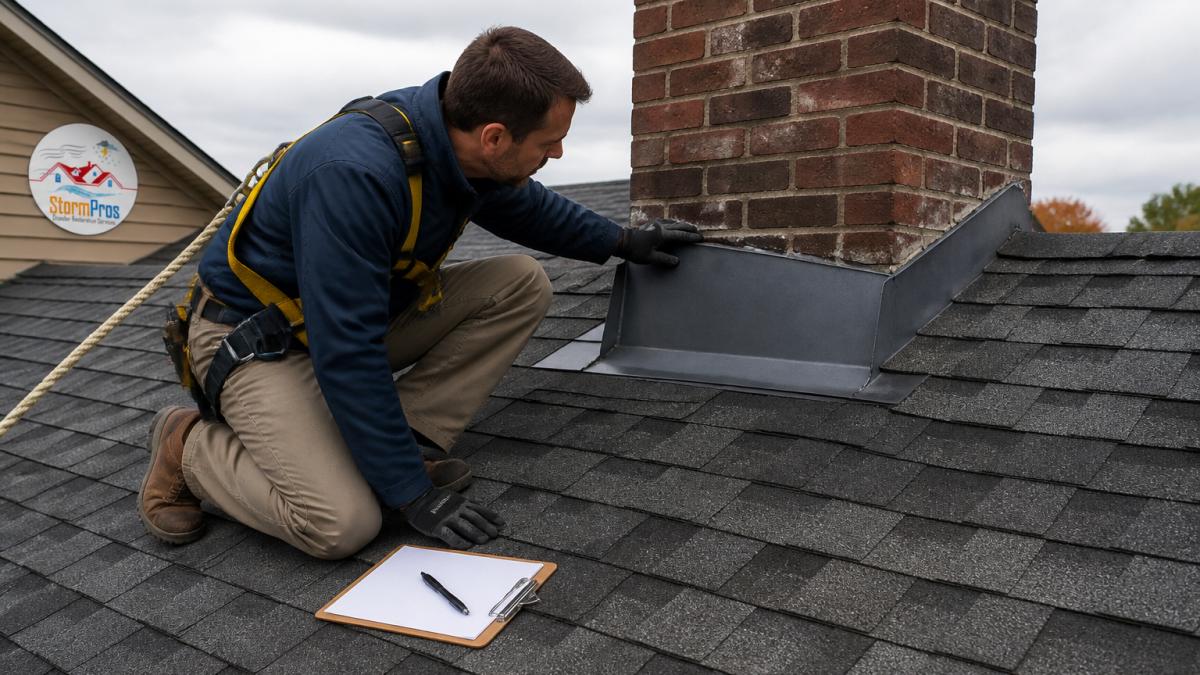
How Long Does a Roof Inspection Take
A standard roof inspection takes 45 minutes to 2 hours for most single-family homes. Small, simple roofs finish fast. Large or steep roofs with attic access and add-on testing take longer. A storm inspection with full photo documentation can run 2 to 3 hours. Time matters because it drives the price, an inspector who quotes a flat fee for a two-hour job is either cutting corners or padding the number.
Here is a rough guide:
| Inspection Type | Typical Time | What It Covers |
|---|---|---|
| Basic visual check | 30-45 min | Roof surface, gutters |
| Standard full inspection | 1-2 hours | Roof, flashing, attic, ventilation |
| Storm/insurance inspection | 2-3 hours | Full inspection plus photo report |
| Inspection with add-ons | 2-4 hours | Above plus drone, moisture, thermal |
Prioritizing Fixes: What to Do First
Once the inspection is done, the report should give you a sequence, not just a list. A practical order looks like this:
- Stop active water intrusion. Tarp, patch, or seal anything letting water in today.
- Address safety hazards. Loose flashing, exposed fasteners, and damaged vents come next.
- Fix the cause, not the symptom. Air sealing and insulation corrections before cosmetic repairs.
- Schedule permanent repairs. Shingle replacement, flashing rebuilds, and ventilation upgrades.
- Verify results. Re-check attic temperature and moisture after the work to confirm the fix held.
Verifying the Work Improved Things
After repairs, look for signs the roof is behaving better:
- Even snow melt across the roof instead of stripes or patches
- No new stains on the attic deck after the next rain or thaw
- Attic temperature closer to outdoor temperature in cold weather
- Gutters flowing freely with no granule piles or ice buildup
If those signs are missing, the underlying cause was not addressed.
Setting Cost Expectations
The average cost of professional roof inspection varies widely by region, roof size, and scope, and most homeowners pay a modest flat fee for a basic check and more for a documented, attic-inclusive inspection. Repair costs after the inspection depend on what is found, air sealing and insulation work is typically less expensive than structural or full-roof replacement. Ask for a written scope with line items so you can compare bids on the same work.
Request the inspection report in writing with photos and a prioritized repair list. A report you can hand to a second contractor or an adjuster is worth far more than a verbal summary.
Your Roof Inspection Checklist: What a Thorough Report Covers
A thorough roof inspection report should let you make decisions without climbing up there yourself. Use this checklist to judge what you get:
- Photos of every roof plane, not just the damaged one
- Close-ups of flashing at chimneys, vents, and valleys
- Attic photos showing the underside of the roof deck
- Notes on granule loss, curling, and missing shingles
- Gutter and downspout condition
- Signs of water intrusion, stains, or soft spots
- Ventilation and insulation observations
- A clear summary of what needs fixing now versus later
- Estimated remaining life of the roof
If a report is missing half of these, ask for a revised version. A report you cannot act on is not worth paying for.
Never accept a verbal inspection summary for an insurance claim. Adjusters work from documents, and a claim without photos and a written scope is far more likely to be denied or underpaid.
Roof Inspection After a Storm: What Changes
A roof inspection after a storm focuses on impact damage, not wear and tear. Hail bruises shingles and knocks granules loose. Wind lifts and tears shingles, especially at ridges and edges. The inspector looks for fresh dents in gutters and vents, cracked seals around flashing, and granule piles in gutters and downspouts.
The big difference is documentation. A storm inspection produces a report built for an insurance claim. That means dated photos, measurements, and a written scope of damage.
Documenting Damage for Your Insurance Claim
Good documentation follows a simple order:
- Photograph the damage up close and from a distance
- Note the date and weather event that caused it
- Measure and map affected areas
- Record matching damage on siding, gutters, and vents
- Write a scope that ties each repair to the damage
This is where a contractor who handles claims regularly earns their keep. We build the report the same way an adjuster reads it, which cuts back-and-forth and speeds up approval.
Federal Emergency Management Agency guidance on documenting disaster damage offers useful tips on photographing and recording damage for claims.
When a Free Inspection Is Enough and When to Pay for More
A free inspection is enough when you want a quick condition check, a second opinion, or a baseline before storm season. Many roofing companies offer these at no cost.
Pay for a full inspection when:
- You are filing an insurance claim
- You are buying or selling a home
- You suspect a hidden leak
- Your roof is near the end of its expected life
- You need a written report for a lender or attorney
The paid inspection gives you documentation and detail the free check will not. That difference matters when money or liability is on the line.
Free inspections tell you what is wrong. Paid inspections prove it in writing. Match the inspection to what you actually need it to do.
For broader guidance on home inspection standards, the American Society of Home Inspectors publishes reference material on what a proper inspection should cover.
Roof problems rarely announce themselves until water is already inside. A proper inspection catches the small stuff before it turns into a ceiling stain, a rotted deck, or a denied claim.
Frequently Asked Questions
How much does a professional roof inspection cost?
Roof inspection cost depends on roof size, pitch, material, and whether you need extras like drone imaging or a moisture survey. Many roofing contractors offer a free inspection when you are considering repair work, while standalone inspections from an independent inspector usually carry a fee. StormPros does not publish fixed prices because every roof and situation differs. Request a free quote so the scope and any costs are confirmed in writing before work begins.
What is included in a roof inspection?
A standard inspection covers shingles for cracking, curling, or missing tabs, flashing at chimneys and vents, valleys, ridge caps, gutters and downspouts, plus an attic check for water stains, daylight gaps, and soft decking. A thorough report includes photos and notes on remaining service life. Ask upfront whether the attic and gutters are part of the visit, since some low-cost inspections only look at the roof surface from the ground.
How long does a roof inspection take?
Most single-family home inspections take 45 minutes to 90 minutes on site. A simple walkable roof with no attic access can finish in about 30 minutes, while steep pitches, multiple levels, or a full attic survey push past two hours. Add time if the inspector documents storm damage for an insurance claim, since photos, measurements, and written notes take longer than a quick visual check.
Does homeowners insurance cover a roof inspection?
Insurance generally pays for inspection-related work when it is tied to a covered claim, such as storm or hail damage, because the adjuster’s evaluation is part of the claim process. Routine maintenance inspections you request on your own are usually your responsibility. If a storm hit your area, document the date and visible damage, then ask StormPros to inspect and prepare findings you can submit with your claim.


