 5.0 Out Of 250+ Reviews

 Financing Available

 (214) 227-2763
Table of Contents
- Visual Signs of Roof Rot After Storms
- Storm Damage Roof Inspection: What to Look For
- Roof Leak Signs: Interior and Attic Indicators
- How to Inspect a Roof After a Storm: Safety and Process
- What to Do After Roof Damage: Immediate Actions
- Material-Specific Rot Indicators
- Documentation for Insurance Claims
- Frequently Asked Questions
Last Updated: October 6, 2026
Visual Signs of Roof Rot After Storms
Storm damage often shows up first inside your home. Water stains and ceiling discoloration are your earliest warning that signs of roof rot after storms are developing.
Ceiling discoloration and water stains
After any major storm, check your ceilings. Brown, yellow, or gray stains mean water has already penetrated your roof deck and is seeping below, expanding as moisture accumulates.
Stains appear in irregular patterns and grow within days or weeks.
If you spot ceiling stains, check your attic immediately with a flashlight. If the roof deck’s underside feels soft or spongy, rot has started and demands urgent attention.
A single water stain can mean significant hidden damage. What you see on the ceiling is often just the tip of the problem. Water travels along roof framing and can damage areas far from the original leak point.
Sagging or warped rooflines
From street level, a healthy roofline looks straight and even. A sagging or dipping roofline means the structural support underneath has weakened, often from water damage and wood rot.
Water infiltration softens the wood fibers in the roof deck and sheathing, reducing their ability to support the roof’s weight until gravity makes it sag visibly.
This isn’t cosmetic. A warped roofline means structural integrity is compromised, so get a professional inspection immediately, waiting makes repairs exponentially more expensive.
Storm Damage Roof Inspection: What to Look For
A thorough inspection reveals the true extent of damage. Here are the specific indicators that require professional attention.
Roof deck and sheathing rot indicators
Soft spots on the roof deck feel squishy underfoot, the wood has absorbed water and lost its density, an advanced rot that compromises structural support.
In the attic, look for discoloration on the roof deck’s underside. Dark stains, black mold, or visible moisture indicate active water damage; the wood may appear warped or buckled.
Granule loss from shingles accelerates rot below: without the protective coating, UV rays and water damage the asphalt layer, and water seeps through to the deck.
Grab a flathead screwdriver and gently probe the underside of the roof deck in suspicious areas. Healthy wood resists the probe. Rotted wood allows the screwdriver to penetrate easily. This simple test reveals rot before it becomes catastrophic.
Flashing damage around chimneys and vents
Flashing is the metal trim sealing gaps where chimneys, vents, and skylights meet the roof.
Look for gaps, lifted edges, or separation where flashing meets the roof. Storms bend or loosen fasteners, and wind can peel flashing away entirely.
Rust stains on your roof or exterior walls indicate flashing corrosion, rusted flashing no longer seals, so water flows through gaps into the structure below.
Check the caulking around flashing: old caulk cracks and peels, creating gaps where water enters.
Missing or damaged shingles
Storm winds tear shingles away, and hail cracks and punctures them. These obvious signs are easy to spot from the ground with binoculars.
Missing shingles expose the underlayment, which isn’t designed to stand alone against rain and UV exposure, so water infiltration accelerates.
Curled or lifted shingle edges indicate wind damage: the adhesive strip has failed, letting water seep under the shingle surface.
Roof Leak Signs: Interior and Attic Indicators
Water damage inside your home confirms that roof rot after storms is actively progressing. These interior signs demand immediate action.
Attic moisture and condensation issues
In your attic, excessive moisture feels heavy and damp. Condensation on roof framing, nails, and metal components indicates active water infiltration.
Wet or discolored insulation has lost its thermal value and harbors mold; compressed or matted insulation suggests water has been pooling there.
Poor attic ventilation traps moisture. Proper ventilation requires unobstructed airflow from soffit vents to ridge vents, and storm debris can block them.
Water stains on roof framing show where water has traveled along the wood.
Mold and mildew growth
Mold appears as black, green, or white spots on wood, insulation, and drywall. After storms, attic moisture creates ideal mold conditions within days.
A musty smell in your attic means moisture accumulation is active and mold spores are already colonizing the space.
Mold on roof sheathing indicates sustained moisture, not a surface problem, water is continuously wetting the wood.
Mold exposure can worsen respiratory issues, allergies, and asthma (the CDC).
Broken or clogged gutters
Gutters channel water away from your roof and foundation. Broken gutters fail to protect your home.
Storm debris, leaves, branches, and shingle granules, accumulates and prevents water from flowing through the gutter system.
The weight of standing water or debris makes gutters sag and pull away from the fascia, so water pools instead of flowing toward downspouts.
Downspouts should direct water at least 4 feet from your foundation.
How to Inspect a Roof After a Storm: Safety and Process
Inspecting your own roof carries real risks: falls cause serious injuries, and wet or damaged roofing is slippery. Understand the process so you know what professionals should evaluate.
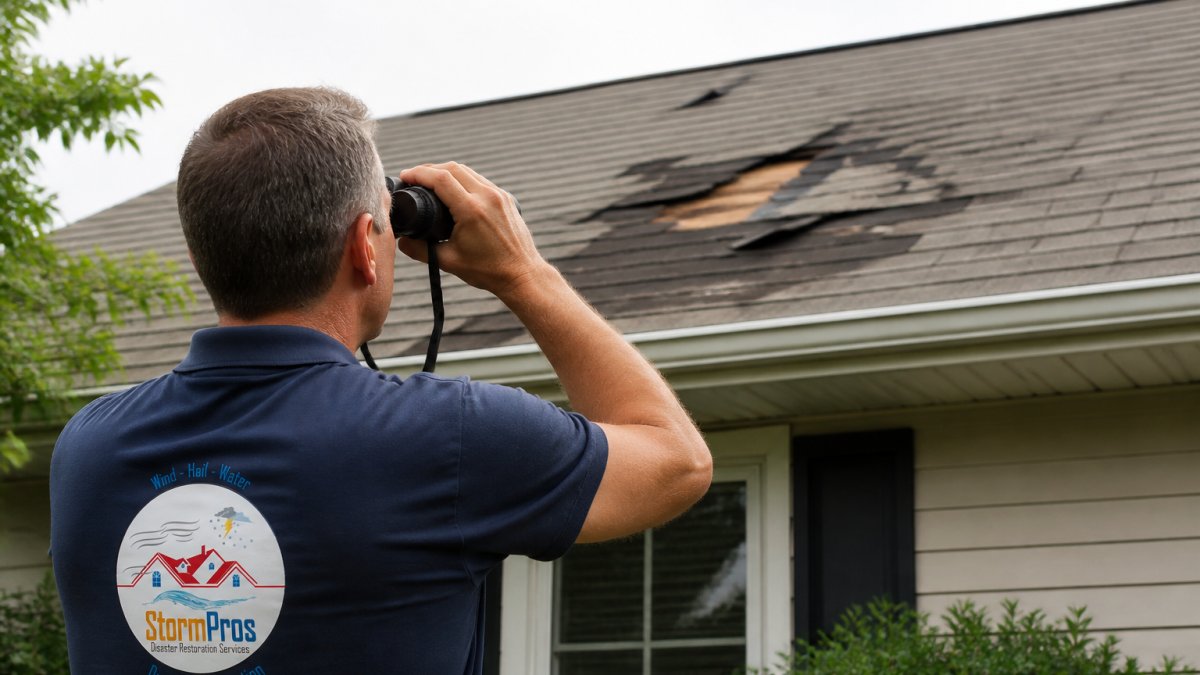
DIY vs. professional inspection safety protocols
DIY inspection from the ground is safe. Use binoculars from street level for a clear view without climbing.
Never climb on a wet or damaged roof, or during and immediately after storms, these conditions make falls far more likely.
Insurance companies often require professional documentation of storm damage.
Professional inspectors use thermal imaging and moisture meters to reveal hidden water damage, identifying rot and moisture accumulation before it becomes visible.
Get a professional inspection within 48 hours of storm damage. Early detection prevents rot from spreading and protects your insurance claim. Professional documentation is essential for claim approval.
Tools and equipment for a thorough inspection
A powerful flashlight with extra batteries reveals details in dark attic spaces.
Binoculars allow ground-level inspection without climbing.
A flathead screwdriver probes suspect roof deck areas for soft wood rot.
A moisture meter measures moisture in wood and insulation; readings above 20% indicate active water damage.
A camera documents damage systematically. Take photos from multiple angles to create the visual record insurance claims need.
A ladder provides safe access to gutters and lower roof areas. Never climb above the first story.
Step-by-step inspection checklist
Start from the ground with binoculars.
Check gutters for debris, standing water, sagging sections, and separated fasteners.
Inspect flashing around chimneys, vents, and skylights for gaps, rust, or lifted edges.
Probe suspect areas with a screwdriver. Test the roof deck and sheathing for soft spots.
Photograph all damage and document the date and time of your inspection.
List damage by location, noting which areas are visible from the ground versus requiring attic access.
What to Do After Roof Damage: Immediate Actions
The hours after storm damage are critical. Immediate action prevents additional water infiltration and protects your insurance claim.
Emergency tarping and temporary mitigation
Tarping covers damaged areas to keep rain out. It’s not a permanent fix, just temporary protection while you arrange repairs.
Use a heavy-duty tarp at least 6mm thick, secured tightly with rope or straps.
Tarping prevents additional interior water damage and buys time for adjusters to inspect and contractors to schedule repairs.
Never wait for insurance approval to tarp.
Don’t tarp a steep or high roof yourself, that’s a job for professionals with safety equipment, since falls cause serious injuries.
Insurance documentation and claim preparation
Contact your insurance company immediately and report the damage within your policy’s timeframe, delays can affect claim eligibility.
Keep all receipts for temporary repairs and emergency mitigation. Insurance reimburses these costs.
Don’t discard damaged materials; adjusters may want to inspect them before removal.
Write a detailed damage description including the storm date, weather conditions, and visible damage, with specific locations and extent.
List damaged items inside your home, water affects insulation, drywall, flooring, and belongings. Document everything.
Material-Specific Rot Indicators
Different roofing materials show rot differently. Understanding your roof type helps you identify damage specific to your situation.
Asphalt shingles and curled or cracked tiles
Asphalt shingles curl at the edges as they age or absorb moisture, and curling accelerates after storms.
Cracked shingles may stay in place but no longer seal, allowing water penetration. Hail impact marks weaken the asphalt material.
Granule loss exposes the asphalt layer beneath, and shingles deteriorate rapidly without granules. Heavy loss means they’re near end of life.
Tile roofs crack under impact. Broken tiles expose the underlayment, and shifted tiles create gaps where water enters.
Underlayment and drip edge damage
Underlayment sits between shingles and the roof deck as a secondary water barrier. Damaged underlayment fails to protect the deck below.
Look for tears, holes, or separation in the underlayment. Storm winds can lift underlayment away from the deck.
The drip edge is a metal strip directing water from fascia into gutters.
Rust on drip edge indicates corrosion. Corroded drip edge becomes brittle and breaks easily, so replacement is necessary to restore drainage.
Documentation for Insurance Claims
Proper documentation is the foundation of a successful insurance claim. Insurers need clear evidence of damage and its extent; thorough documentation accelerates approval and improves the odds of full reimbursement.
Photographing and recording damage systematically
Take photos immediately after the storm to establish the damage timeline. Photos taken weeks later may show additional deterioration, complicating the claim.
Photograph each damaged area from multiple angles: wide shots for overall extent, close-ups for specific details.
Include a ruler, coin, or common object in photos for scale so adjusters understand the size of the damage.
Video is powerful documentation.
Date and time stamp all photos and videos. Most smartphones do this automatically. Timestamps prove when damage occurred.
Creating a comprehensive damage inventory
List every damaged area by location: roof sections, gutters, flashing, siding, windows, and interior damage.
Describe each item in detail.
Estimate the extent: how many shingles are missing, how large is the damaged area, and is damage isolated or widespread?
Prioritize repairs: critical damage (active leaks, structural issues) immediately; secondary damage (cosmetic issues, minor deterioration) can wait.
Create separate lists for exterior and interior damage. Insurance adjusters evaluate these separately.
Include damaged personal property, furniture, electronics, clothing, valuables, documenting everything with photos and descriptions.
Storm damage to your roof demands fast, thorough action. The first 48 hours are critical for preventing escalating water damage and protecting your insurance claim. Professional inspection reveals hidden damage that DIY assessment misses.
Frequently Asked Questions
What are the signs of roof rot after a storm?
Look for ceiling discoloration, water stains, sagging rooflines, and soft spots in the attic. Visible indicators include missing or curled shingles, granule loss, damaged flashing around vents and chimneys, and broken gutters. Interior signs such as mold, mildew, or condensation in the attic also signal water infiltration and potential wood rot in the roof deck and sheathing.
How soon should I inspect my roof after a storm?
Inspect your roof within 24-48 hours of a storm to document damage for insurance claims and prevent further water infiltration. However, prioritize safety: wait for clear weather and stable conditions. If the storm is severe, consider hiring a professional inspector rather than climbing onto a wet or unstable roof yourself. Early inspection helps minimize structural damage and mold growth.
Should I get on my roof to check for storm damage?
Only if you have proper safety equipment and experience. A wet or damaged roof is slippery and unstable, creating fall hazards. Many insurance companies recommend professional inspections for this reason. If you must assess damage, stay on the ground and use binoculars to examine shingles, flashing, and gutters. For attic inspection, use proper lighting and avoid touching soft or discolored wood. A professional inspector has the training, equipment, and insurance to do this safely.
What should I do if I find signs of roof rot after a storm?
Document all damage with photographs and notes for your insurance claim. Cover any openings with tarps to prevent further water infiltration while you arrange repairs. Contact your insurance company to report the damage and request an adjuster visit. Hire a licensed contractor experienced in storm damage restoration to assess the full extent of rot and water damage. Prompt action prevents structural deterioration and mold growth.


