 5.0 Out Of 250+ Reviews

 Financing Available

 (214) 227-2763
Table of Contents
- Why Verifying Storm Restoration Warranties Matters
- Step 1: Confirm Your Contractor’s License and Insurance
- Step 2: Request Written Warranty Documentation
- Step 3: Review Your Roof Repair Warranty Checklist
- Step 4: Understand Roof Warranty Exclusions
- Step 5: Document Your Storm Restoration Warranty Claim
- Step 6: Verify Warranty Transfer and Future Ownership
- Common Mistakes to Avoid When Verifying Warranties
- Frequently Asked Questions
Last Updated: October 7, 2026
Why Verifying Storm Restoration Warranties Matters
After a storm damages your roof, siding, or gutters, a contractor’s warranty becomes your safety net, which is why you need to verify storm restoration warranties before signing anything.
Verifying storm restoration warranties protects your investment. A solid warranty means your contractor stands behind their work, you won’t pay twice if something fails, and your insurance claim translates into lasting repairs.
This guide walks you through the exact steps to verify your storm restoration warranty is real, complete, and enforceable, what to look for, what exclusions matter, and how to document everything.
Step 1: Confirm Your Contractor’s License and Insurance
Before you even look at a warranty, confirm the contractor can legally back it up.
A warranty is only as good as the person issuing it.
Check your contractor’s license first. Every state requires general contractors to be licensed. Your state’s licensing board maintains a public database.
Request workers’ compensation coverage. If your contractor employs workers, they must carry workers’ comp, which protects you if someone gets hurt on your property.
A contractor with an expired license cannot legally enforce a warranty. Even if their work is solid, you have no legal recourse if problems emerge later. Always verify current licensing before signing anything.
Step 2: Request Written Warranty Documentation
Every warranty must be in writing. Verbal promises mean nothing.
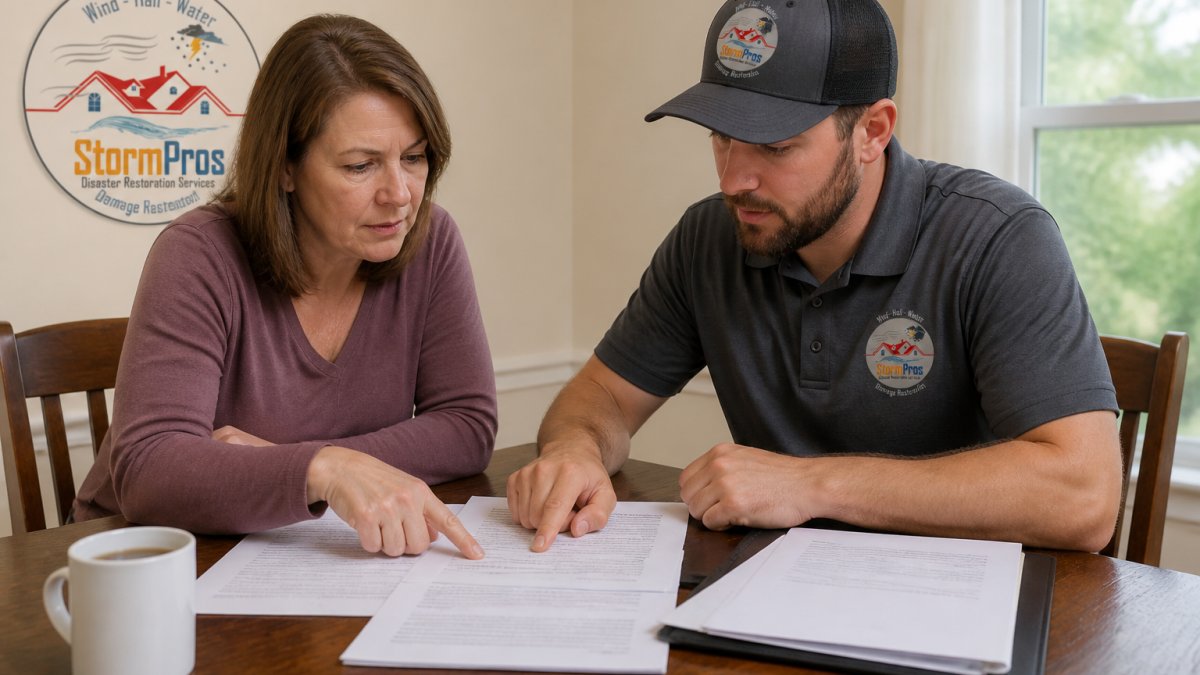
Call your contractor and request the complete warranty document before work starts. Not after. Not during. Before. This gives you time to review it carefully.
Ask for these specific documents:
- The manufacturer’s warranty (if applicable)
- The contractor’s workmanship warranty
- The warranty transfer agreement (if you plan to sell)
Read every page. Warranties are written to protect the contractor, not you, using specific language to exclude certain situations. Know what’s excluded.
Request the warranty in writing via email. This creates a paper trail. If the contractor resists providing written documentation, that’s a red flag. Reputable contractors always provide warranties in writing.
Step 3: Review Your Roof Repair Warranty Checklist
Your warranty document should cover specific areas. Use this checklist to verify nothing is missing.
Check for these essential elements when you verify storm restoration warranties:
- Workmanship coverage (labor and installation)
- Material coverage (shingles, flashing, underlayment)
- Length of coverage (years of protection)
Confirm coverage for storm damage. Some warranties exclude it, others cover it. If the contractor repaired storm damage, know whether storm damage to that repair is covered going forward.
What to Look For in Workmanship Coverage
Workmanship coverage protects against poor installation, labor defects, not material defects.
A strong workmanship warranty covers:
- Improper installation of shingles or flashing
- Leaks caused by installation mistakes
- Gaps or misalignment in materials
Weak workmanship warranties cover almost nothing, hiding behind vague terms like “normal wear and tear” or “weather exposure” that let contractors deny claims easily.
Ask your contractor to define what’s covered. Don’t accept vague language. Get specific examples in writing. If they won’t clarify, request a different warranty or find another contractor.
Material and Manufacturer Warranties
Materials carry their own manufacturer warranties, separate from your contractor’s warranty.
Manufacturer warranties typically cover:
- Defects in the material itself
- Manufacturing flaws
- Premature deterioration
Manufacturer warranties do NOT cover:
- Poor installation
- Storm damage
- Normal weathering
Get the manufacturer’s warranty in writing. Your contractor should provide it registered in your name, if it’s in their name instead, you lose coverage if they go out of business.
Your contractor’s workmanship warranty and the manufacturer’s material warranty work together. You need both. One covers installation. The other covers the materials themselves. Verify both are in place before signing.
Step 4: Understand Roof Warranty Exclusions
Exclusions are the fine print that limits your coverage, and where storm restoration warranties most often fail homeowners. The reason is timing: many exclusions are triggered by what happens between the storm and the permanent repair, not by the storm itself.
Read every exclusion, then read them again with this question in mind: what could void this warranty before the crew even arrives?
The Exclusions That Most Often Sink Storm Claims
- Improper or deferred maintenance. A warranty can be voided if the roof was already in poor condition or if routine maintenance was skipped.
- Wind speeds above the warranty limit. Manufacturer warranties often specify a covered wind speed. A storm that exceeded it can push the claim to insurance instead.
- Hail below a stated size. Many warranties exclude damage from hail under a specified diameter.
Read every exclusion against your local weather. If hail is common, confirm the hail size threshold; if ice dams form on your eaves, confirm that damage is covered; if your area sees named storms, confirm the wind speed limit.
Get clarification in writing. If an exclusion is unclear, ask the contractor to explain it in a separate signed document. Do not accept a verbal explanation.
The Exclusion Nobody Warns You About: Delay
Here is the gap most warranty guides skip: between the storm and the permanent repair, your roof is exposed. If water keeps entering and rot spreads, the claim can be denied as pre-existing or failure to mitigate, even though the original damage was storm-related.
The single most important thing you can do to protect your warranty is stop further water intrusion immediately, and document that you did.
Immediate Mitigation Steps While You Wait for the Contractor
These temporary measures buy time and protect the claim; they do not replace the permanent repair.
- Tarp the damaged area. Use a UV-rated tarp, overlap seams so water sheds downhill, and secure it with battens or cap nails rather than fasteners through the shingle field. Photograph the tarp in place.
- Clear gutters and downspouts so water cannot back up under the eaves.
- Move water away from the foundation and check that downspout extensions discharge well clear of the house.
Keep every receipt for tarps, materials, and any emergency labor. Mitigation costs are frequently reimbursable under homeowners policies, and the receipts also prove to a warranty administrator that you acted to prevent further damage.
Document the Mitigation, Not Just the Damage
For each mitigation step, capture a before photo of the exposed area, an after photo of the tarp or repair in place, the date and time, and who performed it (with a receipt if you paid someone). This record separates a covered claim from a denial when the adjuster asks why the damage spread.
Material-Specific Exclusions to Check
Exclusions differ across roofing materials:
- Asphalt shingles. Watch for granule-loss thresholds, algae-resistance clauses, and wind-speed limits tied to the shingle’s rating.
- Metal roofing. Watch for exclusions tied to oil canning, fastener back-out, and coating or paint fading, which are often treated as cosmetic rather than defects.
- Tile and slate. Watch for exclusions tied to cracking from foot traffic, freeze-thaw cycling, and underlayment age, since the underlayment often fails long before the tile does.
Ask your contractor to point to the specific clause addressing your material, and keep a copy of that page in your evidence file.
Exclusions are not just a list to read, they are a list of actions to take. Mitigate immediately, document the mitigation, and confirm in writing which exclusions apply to your material and your local weather before you sign.
Step 5: Document Your Storm Restoration Warranty Claim
Documentation turns a warranty from a promise into a payout, and the same evidence file that supports a warranty claim is the file your insurance adjuster needs. Build it once, use it twice.
Most homeowners lose warranty and insurance disputes not because the damage was excluded, but because they cannot prove the roof’s condition before, during, and after the repair.
The Storm Damage Evidence File: What to Capture
Start the day you notice damage, before any contractor touches the roof. A complete file includes:
- Wide shots of each roof plane from ground level, taken from the same four corners of the house so before/after angles match.
- Close-ups of every damage point: lifted or missing shingles, creased or torn flashing, dented vents and gutters, cracked pipe boots, and granule piles in gutters or at downspout outlets.
- Interior evidence: ceiling stains, attic decking discoloration, daylight through the roof deck, and damp or matted insulation.
The Insurance Documentation Checklist
Work through this in order. Each item maps to something an adjuster or warranty administrator will ask for.
- Date of loss. The storm date, confirmed against a local weather or storm report for your ZIP code. Save the report as a PDF.
- Pre-storm baseline. Older photos, a recent home inspection report, or a prior roofing invoice, even a real estate listing photo helps establish prior condition.
- Damage inventory. Your photo log, organized by roof plane and component (shingles, flashing, vents, gutters, siding).
- Contractor scope of work. The written estimate or contract, itemized by material and labor, not a lump sum.
- Manufacturer documentation. The product spec sheet and warranty registration confirmation for the materials installed.
- Proof of payment. Invoices and receipts showing what was paid, separate from what insurance reimbursed.
- Claim correspondence. Every email, letter, and adjuster report, saved in one folder.
- Post-repair condition photos. Taken from the same four corners as the pre-storm shots.
Name your files with the date first (for example, 2026-04-12_north-slope_missing-shingles.jpg). When you have 80 photos, chronological filenames are the difference between a clean claim and a denied one.
How to Document Rot Specifically
Rot is the most disputed item in storm claims because it’s often classified as pre-existing. Document it so the timeline is unambiguous:
- Photograph the rot in place before removal, with a tape measure or coin for scale.
- Note whether the rot is wet or dry: fresh, wet rot near a storm-created opening supports a storm-origin argument; dry, crumbly rot across a wide area reads as long-term.
- Photograph the underside of the decking from the attic where accessible.
Deadlines That Kill Claims
Two clocks run at once, and missing either can void your recovery:
- Insurance claim clock. Most policies require prompt notice of loss; waiting until a contractor confirms damage weeks later can complicate the claim. Report the loss as soon as you reasonably suspect it.
- Warranty claim clock. Warranty documents typically require notice within a set window after you discover a defect. Calendar that date the day you sign.
Never let a contractor “handle everything” with your insurer while keeping the documentation. You are the policyholder. Keep your own copy of every document submitted in your name, and confirm in writing what was sent and when.
When the Warranty Claim and the Insurance Claim Overlap
If a repair fails and you file a warranty claim, the administrator may ask whether insurance already paid for that work. Keep the two files separate but cross-referenced:
- The insurance file proves the storm damage and covered scope.
- The warranty file proves the work was performed under warranty and that the failure is a workmanship or material defect, not a new storm event.
A single indexed folder with both sets of documents, plus a one-page timeline, is the fastest way to resolve a dispute before it becomes a legal one.
Your evidence file is the warranty’s proof of life. Photograph before, during, and after; log every date; keep originals; and never hand your only copy to a contractor or adjuster.
Step 6: Verify Warranty Transfer and Future Ownership
If you plan to sell, your warranty may or may not transfer to the new owner.
Check your warranty document for transfer terms. Some warranties transfer automatically. Others require registration with the new owner. Some don’t transfer at all.
Understand the financial impact. A transferable warranty increases your home’s value. Buyers pay more for homes with warranties.
Common Mistakes to Avoid When Verifying Warranties
Most homeowners make predictable errors when reviewing warranties. Avoid these.
Mistake 2: Skipping the fine print. Exclusions hide in the details. Read every page.
Mistake 4: Not verifying the contractor’s license. A warranty from an unlicensed contractor is worthless.
Mistake 6: Waiting too long to file claims. Warranties have deadlines.
Mistake 7: Assuming storm damage is always covered. Many warranties exclude specific types of storm damage.
When you’re ready to restore your property after storm damage, StormPros can help. We handle insurance claims so you don’t have to, and document everything properly so your warranty is enforceable. Get a FREE Quote from StormPros today and verify your protection is in place.
Frequently Asked Questions
How do I verify a storm restoration contractor’s warranty?
Request the warranty in writing before work begins. Check that it covers both workmanship and materials, specifies the coverage period, and clearly lists exclusions. Verify the contractor’s license with your state licensing board and confirm they carry liability and workers’ compensation insurance. Ask for references from previous storm restoration projects and contact them directly about their warranty experience.
What should a roof repair warranty checklist include?
Your roof repair warranty checklist should cover workmanship duration (typically 5-10 years), material warranties from manufacturers, specific coverage for flashing, underlayment, and sheathing, exclusions for weather events or poor maintenance, warranty transferability to new owners, and the contractor’s process for handling claims. Include the contractor’s contact information, warranty start date, and any conditions that void coverage.
What documents should I keep after storm restoration work?
Keep the signed warranty agreement, the original estimate and final invoice, before-and-after photos of the damage and repairs, the contractor’s license and insurance certificates, manufacturer warranty cards for materials used, inspection reports from your insurance adjuster, and any correspondence about the storm restoration warranty claim. Store these in a safe location for at least 10 years, as you may need them if issues arise or if you sell your home.
Can a contractor’s warranty be transferred to a new homeowner?
Some workmanship warranties are transferable to subsequent owners, while others are not. Check your warranty documents, this should be explicitly stated. Manufacturer warranties on roofing materials are often transferable with proof of purchase and original installation date. If you plan to sell, ask your contractor to provide a warranty transfer document that new owners can present if they need to file a claim.


