 5.0 Out Of 250+ Reviews


 Financing Available


 (214) 227-2763

Table of Contents
- What Makes a Roof Wind-Resistant?
- Comparison Table: Best Roofing Materials for High Winds
- Metal Roofing: Standing Seam and Corrugated Panels
- Wind-Rated Asphalt Shingles: What to Look For
- Clay and Concrete Tile Roofing in High-Wind Zones
- Synthetic Roofing Materials: Rubber Composite and Synthetic Slate
- How to Reinforce Your Roof for High Winds
- Roof Wind Damage Insurance Claims: What Homeowners Need to Know
- Frequently Asked Questions
Last Updated: September 16, 2026
What Makes a Roof Wind-Resistant?
A wind-resistant roof is a complete system, not just a covering. The best roofing materials for high winds combine a continuous load path from roof deck to foundation, materials tested to recognized wind uplift standards, and installation patterns that match local building codes. We help homeowners understand that the material on top matters far less than how the assembly holds together when gusts hit 110 mph.
Three factors determine how well any roof handles wind:
- Wind uplift rating: Measured in pounds per square foot, this tells you how much negative pressure the assembly can resist.
- Roof geometry: Hip roofs shed wind better than gable roofs because the slope redirects airflow rather than catching it.
- Continuous load path: Every connection, from roof deck to wall framing to foundation, must transfer wind forces downward without a weak link.
Comparison Table: Best Roofing Materials for High Winds
| Material | Wind Rating | Best For | Key Weakness |
|---|---|---|---|
| Standing seam metal | Up to 140+ mph | Coastal and high-wind zones | Higher upfront cost |
| Corrugated metal panels | 110-140 mph | Exposed rural properties | Fastener corrosion over time |
| Wind-rated asphalt shingles | 110-130 mph | Most residential roofs | Sealant strip degradation |
| Clay and concrete tile | 110-150 mph (when properly fastened) | Mediterranean and hot climates | Heavy; needs reinforced framing |
| Synthetic slate/composite | 110-130 mph | Historic-look homes | Variable quality across brands |
| Rubber composite | 100-120 mph | Flat and low-slope roofs | Limited color options |
The table reflects general performance when each material is installed to manufacturer specification. Real-world results depend heavily on installation quality.
Metal Roofing: Standing Seam and Corrugated Panels
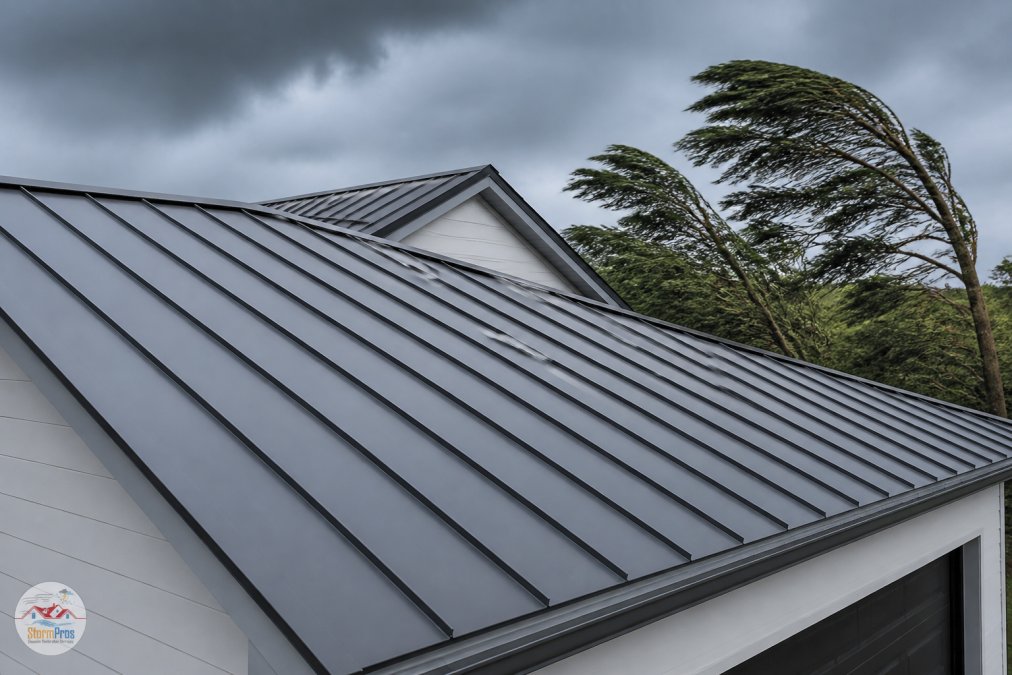
Standing seam metal roofing is the strongest commonly available option for high-wind areas. Concealed fasteners mean no exposed screws for wind to catch, and the interlocking panel design creates a continuous mechanical connection across the roof. Panels attach with clips that allow thermal movement while resisting uplift.
Wind-Rated Asphalt Shingles: What to Look For
Asphalt shingles remain the most common roofing material, and modern wind-rated products perform far better than their reputation suggests. The key is the manufacturer’s wind warranty rating. Standard shingles carry a 60-70 mph rating; wind-rated architectural shingles reach 110-130 mph.
Look for three things on the label:
- ASTM D7158 or ASTM D3161 classification: These are the standard test methods for wind resistance. Class H (D7158) indicates the highest wind rating.
- Enhanced sealant strips: The adhesive that bonds shingle tabs to the course below is the primary wind defense. Reinforced sealant strips resist breaking under uplift.
- Six-nail fastening pattern: Four nails per shingle is standard. Six nails, placed in the enhanced pattern specified by the manufacturer, dramatically improves wind uplift resistance.
Installing wind-rated shingles with a four-nail pattern voids the wind warranty. This is a common installation error, and it turns a 130 mph shingle into a 70 mph shingle. Always verify the fastening pattern matches the manufacturer’s high-wind specification.
Clay and Concrete Tile Roofing in High-Wind Zones
Clay and concrete tiles are heavy, and that weight works in your favor during wind events. A properly fastened tile roof resists uplift through mass and mechanical attachment. In high-wind zones, tiles must be mechanically fastened with screws or clips, not just adhered with mortar or foam.
Synthetic Roofing Materials: Rubber Composite and Synthetic Slate
Synthetic roofing materials have matured significantly, and several products now carry wind ratings competitive with traditional options. Rubber composite roofing, made from recycled tires, performs well on flat and low-slope roofs where wind uplift is less severe. Synthetic slate replicates natural slate at a fraction of the weight, so it can go on roofs that would need structural reinforcement for real slate.
How to Reinforce Your Roof for High Winds
Reinforcing an existing roof is often more cost-effective than full replacement, and it targets the failure points that actually cause roofs to leave a house. Wind rarely removes a roof because the covering was the wrong brand; it removes a roof because a connection failed along the load path, and the covering went with it.
1. Roof-to-wall connections (hurricane straps and clips)
This is the single highest-value retrofit. In a wind event, uplift tries to lift the roof deck off the walls. If the truss or rafter is held to the wall framing only by toenails, that connection can pull out. Metal connectors, hurricane straps, clips, or embedded anchors, tie the two together mechanically.
- Strap vs. clip: A strap wraps over the truss top and down the wall plate, resisting uplift and lateral movement. A clip is smaller and resists uplift only. Straps generally outperform clips.
- Nail schedule matters: A connector is only as strong as its nails. Manufacturers specify a minimum number and type of fasteners (often 10d or 8d nails, filled in every hole). A strap installed with two nails instead of the specified ten provides a fraction of its rated capacity.
- Retrofit reality: On a finished house, adding straps means working in the attic at each truss-to-wall intersection. It is labor-intensive but does not require removing the roof.
2. Sheathing attachment and nail selection
Wind uplift pulls on the roof deck itself. If sheathing panels are under-nailed or nailed only into the thin edge of a rafter, they can peel away even when the covering holds.
- Nail type: Ring-shank or screw-shank nails grip far better than smooth-shank nails under cyclic wind loading, which can withdraw over time as the wood dries and the roof flexes.
- Nail pattern: Field nailing is typically 6 inches on center along panel edges and 12 inches in the field, but high-wind zones often require tighter edge spacing. Overdriven nails, sunk below the panel surface, lose most of their holding power.
- Panel gaps: Sheathing panels should be spaced about 1/8 inch apart to allow expansion. Panels butted tight can buckle and crack, creating a starting point for wind and water intrusion.
3. Edge metal, drip edge, and ridge caps
Roof edges experience the highest uplift pressures on the assembly. Wind accelerates as it flows over the edge, creating concentrated negative pressure that pries at fascia, drip edge, and the first course of covering.
- Drip edge attachment: Fasten drip edge to the roof deck, not just the fascia board. Fascia is often thin and rots; deck attachment is structural.
- Ridge and hip caps: These should be mechanically fastened, not only adhered. Adhesive-only ridge caps are a frequent failure point in high-wind events.
- Edge metal spacing: Fasteners along rake and eave edges should follow the manufacturer’s high-wind detail, which is tighter than the standard detail.
4. Gable end bracing
On gable roofs, the triangular end wall is a large flat surface that catches wind and can rack sideways. Bracing the gable end back to the roof framing reduces this lateral movement and the cracking it causes at the ridge and rake.
5. Secondary water barrier underlayment
A secondary water barrier does not stop uplift. It keeps water out if the covering is breached during a storm, preventing the interior damage that turns a repairable roof into a total loss. In high-wind zones, a peel-and-stick membrane under the covering is a common upgrade over standard felt.
Ask your contractor to photograph the roof-to-wall connections during inspection. Many homeowners discover their “reinforced” roof has straps on only half the trusses, or straps installed with two nails instead of the specified pattern. Seeing the actual hardware is the only way to know what you have.
The material on top gets the marketing attention, but the fastening beneath it decides whether the roof stays on. Straps, ring-shank nails, and deck-attached edge metal routinely matter more than the shingle brand.
Roof Wind Damage Insurance Claims: What Homeowners Need to Know
Filing a roof wind damage claim requires documentation proving the damage resulted from a covered wind event, not age or poor maintenance. Insurers deny claims they can attribute to deferred maintenance, so your roof’s condition before the storm matters enormously.
Post-storm inspection checklist
Most homeowners do not know what wind damage looks like until it becomes a leak. A short inspection after every significant wind event catches problems while they are still cheap to fix. Work from the ground up and only go on the roof if it is safe.
- Ground-level scan: Look for shingle tabs, tile pieces, ridge cap fragments, or metal panel sections in the yard, direct evidence of uplift.
- Ridge and hip lines: With binoculars, check whether ridge caps are lifted, cracked, or missing. They fail first because they see the highest uplift.
- Roof edges and rake: Check for lifted or missing drip edge, bent fascia, and exposed underlayment at eaves and rakes.
- Shingle tabs: Look for tabs that are creased, flipped, or missing granule coverage in patches. Creasing indicates the sealant strip broke and the tab flexed.
- Granule loss: Heavy granule accumulation in gutters or at downspout outlets after a storm can indicate shingle surface damage.
- Attic check: Look for daylight through the roof deck, water staining on rafters or sheathing, and shifted or cracked framing at the roof-to-wall connection.
- Gutters and downspouts: Check for sections pulled loose, which can indicate wind loading on the roof edge.
- Flashing: Inspect chimney, vent, and valley flashing for lifted or torn metal.
The claims process
- Document the damage with dated photos and notes before any temporary repairs.
- File the claim promptly and request a copy of the adjuster’s report.
- Get an independent assessment from a contractor who understands wind damage patterns.
- Review the settlement against the scope of work, not just the dollar amount.
- Negotiate if the settlement does not cover the full restoration.
Premium discounts for wind-resistant roofs
This is the part most homeowners never hear about. Many insurers offer premium credits for roofs that exceed local code minimums for wind resistance, and some offer credits for documented mitigation work such as hurricane straps or a secondary water barrier. The credit is usually a percentage of the wind portion of your premium, offsetting part of the upfront cost of an upgrade over time.
What typically qualifies:
- A roof covering rated above the local code minimum for wind uplift, verified by the manufacturer’s test data.
- Documented roof-to-wall connectors such as straps or clips, often verified by a wind mitigation inspection.
- A secondary water barrier under the covering.
- Impact-rated coverings in hail-prone areas, which some carriers treat as a separate credit.
Material choice affects more than storm survival. It affects your premium. A documented wind-resistant roof can earn a mitigation credit, and the inspection report that earns it also documents your roof’s condition for future claims and resale.
Frequently Asked Questions
What type of roofing is best for high winds?
Metal roofing, particularly standing seam, performs best in high winds because panels are continuous from eave to ridge and fastened with concealed clips, eliminating lift points. Wind-rated asphalt shingles with a 130 mph rating are a close second and cost less. Clay and concrete tiles also perform well when installed with mechanical fasteners and mortar, but they are heavier and require a reinforced roof deck.
What shingles are 130 mph wind rated?
Several manufacturers offer asphalt shingles with a 130 mph wind rating, typically their premium architectural lines. These shingles meet ASTM D3161 Class F or ASTM D7158 Class H standards and require a minimum of four nails per shingle plus enhanced starter strips and ridge caps. Check the product label for the wind warranty speed; many standard three-tab shingles are only rated to 60 or 70 mph.
How can I reinforce my roof for high winds?
Start by adding ring-shank nails or screws to secure sheathing to trusses at 6 inches on center along edges and 12 inches in the field. Install hurricane straps or clips at every rafter-to-wall connection. Apply a peel-and-stick underlayment along eaves and valleys to prevent wind-driven rain intrusion. Finally, use a six-nail pattern on shingles and seal all roof deck penetrations with flashing.
How does roof shape affect wind resistance?
Hip roofs perform better than gable roofs in high winds because they have four sloping sides that deflect wind upward and reduce uplift pressure at corners. Gable roofs create a large flat end wall that catches wind and can cause the roof to lift. If you have a gable roof, adding bracing or converting to a hip design can improve wind resistance, but consult a structural engineer first.


